REVIEW · AUCKLAND
Private Auckland Half Day Tour
Book on Viator →Operated by TIME Unlimited Tours · Bookable on Viator
Four hours can feel like a quick Auckland reset. This private half-day tour strings together the city’s best viewpoints with the comfort of a Mercedes, plus a guide who keeps things lively. I like the photo-friendly pacing (lots of stop-and-see moments) and the fact you get snacks and bottled water, which is rare at this level. One thing to keep in mind: you’ll do plenty of looking, but not much ticketed entry—some stops are photo stops, and museum entry isn’t included.
This is also a solid pick if you care about more than just scenery. The guides—people like Donna, Neill and Ceillhe Sperath, Julia, Linda, Sofire, and Harry—are repeatedly praised for being welcoming and strong on local context, including Maori perspectives where it fits naturally. I’d just plan your expectations for a “best-of Auckland overview,” not a deep museum day.
You start at Sky Tower in central Auckland at 9:00am and finish back at the meeting point around 1:00pm, with pickup available. It’s designed for small-group privacy, so you’re not stuck in a crowd while you’re trying to take in the Hauraki Gulf and the North Shore.
In This Review
- Key things to know before you go
- What you really get in 4 hours of private Auckland time
- Sky Tower pickup and the Mercedes comfort factor
- Hauraki Gulf stop: where Auckland’s “big views” start
- Tamaki Drive: the classic coastline drive with real payoff
- Mission Bay and the Auckland Domain photo moment
- Auckland Harbour Bridge: the visual centerpiece on the drive
- North Shore energy and Devonport’s marine-village feel
- Price and value: what $369.24 per person buys you
- Who this tour suits best (and who should skip it)
- Tips to make your half day run smoothly
- The guide factor: why the human touch matters
- Should you book this private Auckland half day tour?
- FAQ
- How long is the private Auckland half day tour?
- Where does the tour start and end?
- Is pickup available?
- Is this tour private?
- Are attraction or admission tickets included?
- Is the Auckland Museum included?
- What’s included in the price?
Key things to know before you go

- Private Mercedes transport with pickup and return to Sky Tower makes this easy on your schedule.
- Flexible timing means the route can adjust to your day and energy level.
- Hauraki Gulf and volcano views set the tone early, before you move into the city’s coastline highlights.
- Tamaki Drive + Mission Bay give you that classic Auckland feel with quick photo opportunities.
- Harbour Bridge drive is a big-ticket visual moment even when you’re short on time.
- Snacks and water are included, so you can stay out exploring instead of hunting for a snack bar.
What you really get in 4 hours of private Auckland time
The big value here is that you’re not renting a car and guessing the best pull-offs. You’re paying for a guided route that hits several “wow” viewpoints in a half day, with the convenience of a driver doing the driving while you focus on looking, photographing, and asking questions.
The tour runs about 4 hours (9:00am–1:00pm). In that window, you get a strong Auckland sampler: coastal panoramas, iconic city roads, and a North Shore vibe that feels worlds apart from central streets.
The pacing is also the point. Some stops are short, like photo moments, while others are longer (notably the Hauraki Gulf segment). That mix is ideal if you want variety without feeling rushed every single minute.
You can also read our reviews of more private tours in Auckland
Sky Tower pickup and the Mercedes comfort factor
Your start point is Sky Tower in Auckland Central, and the tour ends back at the same meeting location. Pickup is offered, and it’s “near public transportation,” which matters if you’re mixing this day with other plans around downtown.
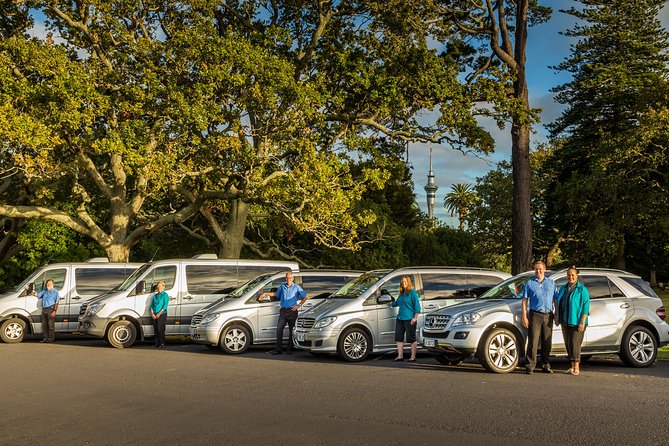
Transport is in a Mercedes luxury vehicle. That might sound like a fancy detail, but it actually changes the experience: Auckland traffic and parking around scenic lookouts can be annoying, and a comfortable ride makes the whole half day feel calmer.
Also, this is a private tour, meaning only your group participates. If you’re the sort of traveler who likes control—what side of the road for photos, when to stretch your legs, what you want your guide to emphasize—privacy is a big deal.
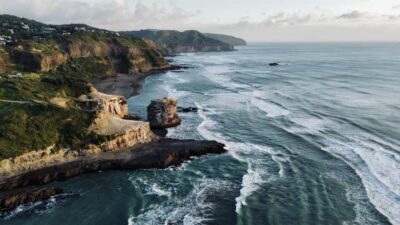
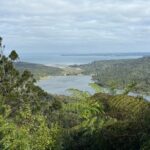
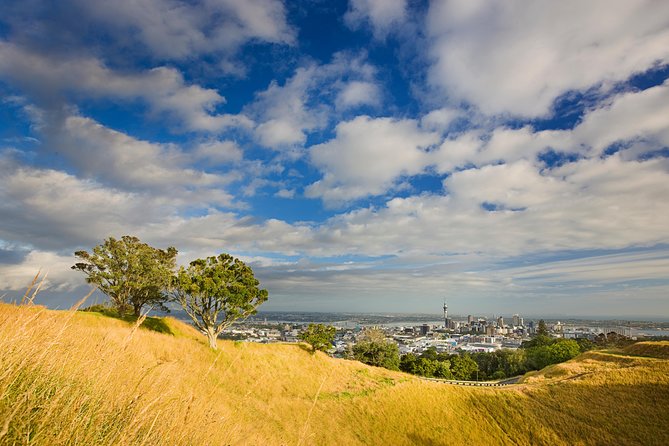
Hauraki Gulf stop: where Auckland’s “big views” start
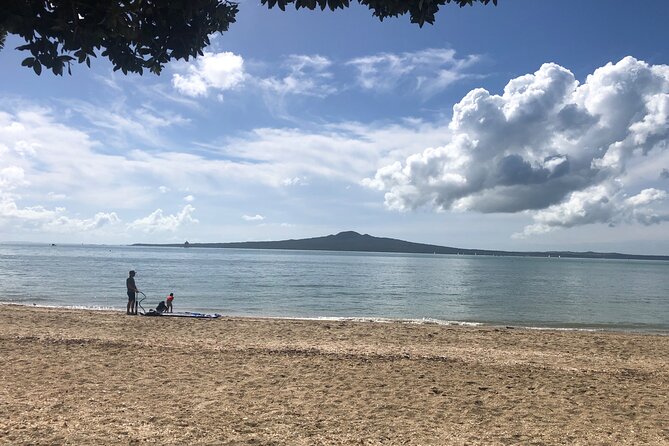
The tour begins with Hauraki Gulf as your first major stop. This is where the region’s scale hits you: the water, the coastline, and the sense that Auckland sits between sea and sky.
It’s also a smart opener because it sets context. You’re not just seeing pretty water—you’re getting the orientation for how the city and the North Shore relate to each other. The tour overview points to views of ancient volcanoes as well, and that kind of geology makes the city feel more grounded and less random.
One practical consideration: this is a longer segment (the schedule lists about 3 hours here). That’s great if you like questions and slow sightseeing, but if you’re the type who wants constant movement, you might feel it’s less “stop-hopping” than you expected. Still, for many people, the gulf viewpoints are the highlight worth taking time over.
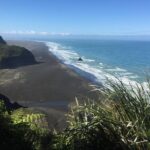
Tamaki Drive: the classic coastline drive with real payoff
Next you’ll drive along Tamaki Drive. It’s famous for a reason—this is one of those Auckland stretches that feels like a postcard while you’re actually in it.
The timing here is about 30 minutes, so you get the big coastline views without eating up your whole half day. This is also the kind of road where being driven matters: you can watch the shoreline, enjoy the harbor views, and take photos when the angle looks right instead of trying to manage traffic and parking.
If you’re trying to understand Auckland quickly, Tamaki Drive is one of the fastest ways to “get the layout” of the city’s relationship to the water.
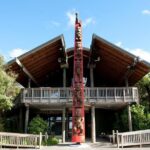
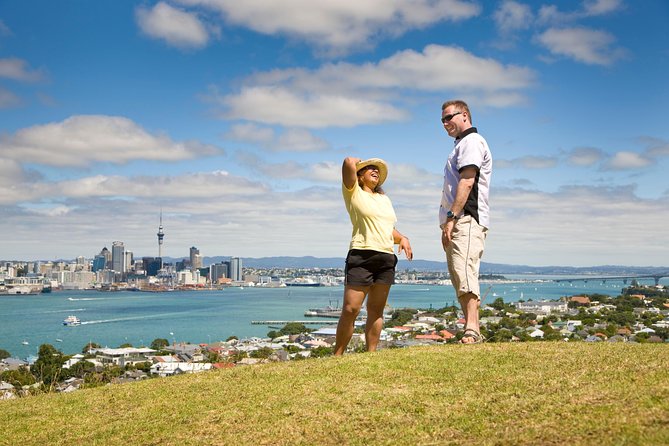
Mission Bay and the Auckland Domain photo moment
After Tamaki Drive, you’ll head to Mission Bay, a beautiful suburb along the same coastline. The stop is short (around 10 minutes), which usually means you’re moving through it for views and a quick look rather than lingering for a long walk.
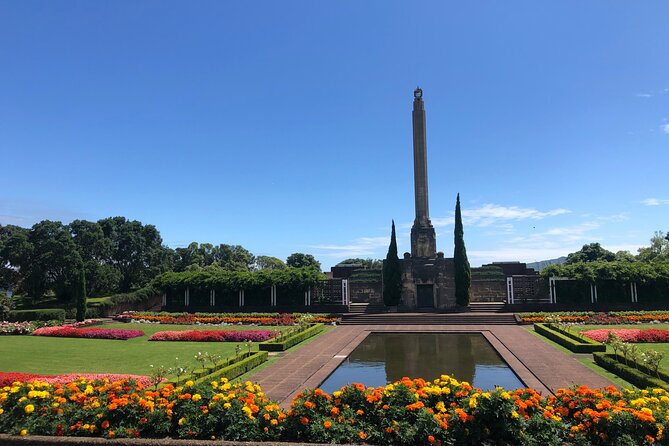
Then you’ll move toward Auckland Museum and the Auckland Domain area. The schedule notes you’ll drive through and have time to take photos, with the museum as the center point. Important detail: this is a photo stop, not an included museum visit. If you want museum time, you’ll need to explore separately.
This combo is a good use of limited time. The Domain area gives you a “city meets nature” feeling, and the museum exterior/photo moment adds a sense of place without turning your day into a ticket line and timetable scramble.


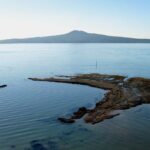
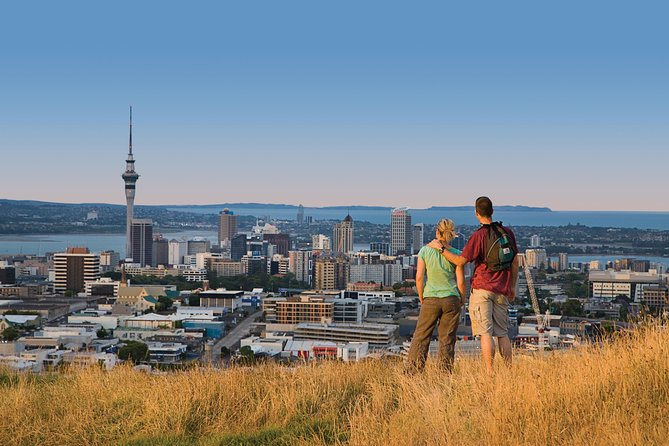
Auckland Harbour Bridge: the visual centerpiece on the drive
A key moment is crossing Auckland Harbour Bridge. Even if you’ve seen the bridge in photos, being on it changes your sense of scale. You get Auckland city views from the road, which makes this more than just transport—it’s part of the sightseeing.
This is also a useful way to experience geography in motion. You’ll see how the city and the North Shore relate across the harbor, which helps everything you’ve already seen at Hauraki Gulf start to click together.
And since the tour is private, you can usually focus on the ride and the views without the friction of large-group coordination.
North Shore energy and Devonport’s marine-village feel
The tour is described as covering Auckland City plus the marine village of Devonport on the North Shore. Even when a half-day schedule doesn’t give you hours to wander, Devonport is the kind of place that tends to leave an impression because it feels distinctly different from central Auckland.
If you like variety—city views in one direction, seaside character in the other—this North Shore emphasis is the “why” behind booking. It’s not only about landmarks. It’s about getting a feel for the region’s different moods in one morning.
Because Devonport isn’t broken out as a named time block in the stop list you have here, I’d treat your time in that area as part of the overall North Shore routing rather than assuming a long walk. Still, the intent is clear: you’re meant to leave with a stronger sense of Tamaki Makaurau across more than one kind of neighborhood.
Price and value: what $369.24 per person buys you
Let’s talk money plainly. At $369.24 per person for about 4 hours, this isn’t a budget tour. You’re paying for a few things at once:
- A private Mercedes (not just a taxi, not just a shuttle)
- Pickup and return to Sky Tower
- A guide for the whole sightseeing block
- Included snacks and bottled water
- Flexibility to match your schedule
For value, the question isn’t only the total cost. It’s whether you’re saving time and decision-making. If you have limited days in Auckland and you want a fast, confident overview, paying for a driver and a route can be cheaper than the time you’d spend piecing together your own plan.
A small note to protect your expectations: possible entry fees are not included. And the Auckland Museum portion is photo time, not admission.
One more planning point: the experience is non-refundable and can’t be changed. If your dates are firm, it’s straightforward. If they’re likely to shift, you’ll want a bit of caution.
Who this tour suits best (and who should skip it)
This is a great fit if you want:
- A comfortable, private way to see Auckland highlights fast
- Lots of viewpoints and photo opportunities
- A guide who can explain what you’re seeing, including Maori cultural context where relevant
- A morning plan that doesn’t turn into a complicated logistics puzzle
It might be less ideal if you want:
- Long museum time or included museum entry (the museum stop is for photos)
- A tour that feels like a full-day walking trip
- A strictly low-cost day (this is priced as a premium private service)
Also, the tour says most travelers can participate, and you’ll be near public transportation around the meeting area—useful if you’re coordinating with other parts of your trip.
Tips to make your half day run smoothly
Here’s how I’d set yourself up for a great morning with this kind of schedule:
- Bring a camera plan. Several stops are short, so aim to know what you want in your photos before you get out.
- Budget for any entry fees you decide to add. The tour itself says possible attraction fees aren’t included.
- Dress for visibility. Even on a calm morning, harbor viewpoints can be breezy; having layers helps you enjoy stops longer.
- If you care about specific topics—history, Maori perspectives, architecture, coastal ecology—tell your guide early. A private format works best when you steer the conversation.
Because snacks and bottled water are included, you don’t need to hunt down food mid-route. That alone makes the half day feel more relaxed.
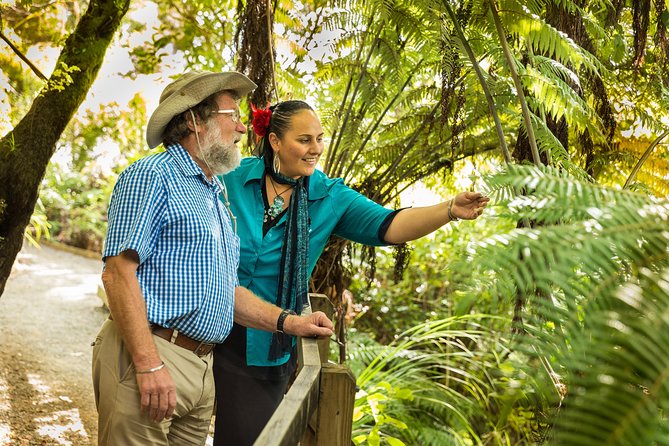
The guide factor: why the human touch matters
A big theme in the guide mentions tied to this tour is warmth and competence. Donna is described as a friendly, super cool host; Neill and Ceillhe Sperath are noted for going above and beyond; Julia, Linda, Sofire, and Harry are also highlighted for knowledge, clarity, and making guests feel welcome.
That matters because Auckland is the kind of city where the scenery can look similar if you don’t have context. A good guide turns a “pretty harbor view” into an understanding of why Auckland is shaped the way it is, what the water means to the region, and how Maori history and culture connect to the places you’re seeing.
Should you book this private Auckland half day tour?
If you want a high-comfort, guided Auckland overview in the morning, I’d say yes. The route is built around major viewpoints—Hauraki Gulf, Tamaki Drive, Mission Bay, Auckland Domain photo time near the museum, and a drive across the Harbour Bridge—so you’re likely to come away with a clear sense of the city’s geography without spending your day on planning.
Book it if:
- You like private touring and hate squeezing into group schedules
- You’re short on time and want the “greatest hits” feel
- You want a guide-driven day with snacks and a Mercedes ride
Think twice if:
- Your priority is deep museum exploration (this tour doesn’t include museum entry)
- You’re uncertain about dates, since it’s non-refundable
- You’re trying to keep costs as low as possible
If you’re aiming for an efficient, scenic, and guided Auckland morning, this tour is the kind of decision that makes the rest of your trip easier.
FAQ
How long is the private Auckland half day tour?
It’s approximately 4 hours, running from 9:00am to 1:00pm.
Where does the tour start and end?
The meeting point is Sky Tower Auckland Central (Auckland 1010), and the tour ends back at the same meeting point.
Is pickup available?
Yes, pickup and dropoff are available.
Is this tour private?
Yes. It’s a private tour/activity, and only your group will participate.
Are attraction or admission tickets included?
Admission tickets are not included, and there may be possible entry fees to attractions.
Is the Auckland Museum included?
The tour includes driving through the Auckland Domain area and time for photos, but it does not include going into the museum.
What’s included in the price?
The tour includes a fully guided private experience in a Mercedes luxury vehicle, snacks, and bottled water.