REVIEW · AUCKLAND
Half-day Discover Auckland City Sightseeing Tour
Book on Viator →Operated by Auckland City Tours · Bookable on Viator
Volcanic views and Harbour Bridge in four hours. This small-group Auckland tour strings together the big sights fast, with live commentary and plenty of photo stops along the way. You’ll ride from downtown waterfront lookouts to the North Shore, then up to Mt Eden for that classic panoramic payoff.
I especially like the way it pairs sweeping harbour scenery with neighborhood texture. You get the Mt Eden summit perspective, plus drives through places like Ponsonby and Queen Street so you can picture where you’ll want to spend more time later. Guides such as Josh, John, and Paul are often praised for the mix of history, humor, and practical local tips that make the city feel less like a blur.
One drawback to consider: it’s a half-day “highlights” loop, not a sit-down, linger-everywhere tour. If you want long time at any single spot (like Auckland Museum), you’ll need to plan that on your own afterward.
In This Review
- Key things that make this tour worth your time
- A half-day Auckland loop that actually helps you plan
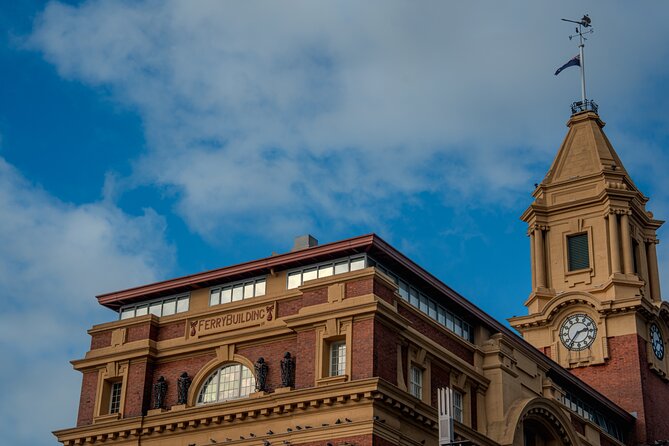
- Where you meet: Ferry Building makes the start simple
- Waterfront Auckland: Viaduct Harbour to Westhaven Marina
- Crossing to the North Shore: Bridge views and the city across the water
- Little Shoal Bay Reserve: the best “Auckland spread” photo
- Northcote coffee option (but no formal tea break)
- Ponsonby and Parnell: architecture, shopping, and the story behind the streets
- Mt Eden summit: the walk that turns a tour into a memory
- Auckland Domain and Auckland Museum: see the area, skip the extra time
- The coastal drive: Ohaku Bay, Mission Bay, Kohimarama, and St Heliers
- Achilles Point: the islands-and-city combo photo
- Downtown orientation: Symonds St, Queen Street, and heritage landmarks
- Live guide energy: when humor and history make the ride worth it
- How much you pay: $46.54 for a full-value half day
- Who should book this tour (and who might prefer something else)
- Should you book this Auckland City Sightseeing Tour?
- FAQ
- Where is the main meeting point?
- How long is the tour?
- How many people are on the tour?
- What are the key stops during the day?
- Is the tour guide commentary included?
- Is there a bathroom stop?
- Do you include coffee or meals?
- Can I cancel for a full refund?
- Do children or strollers have any requirements?
Key things that make this tour worth your time
- 18-person maximum keeps it personal, not cattle-car city sightseeing
- Mt Eden includes a summit walk (about 5–10 minutes each way) for serious views and bathrooms
- Harbour Bridge + North Shore viewpoints give you big-picture photos from multiple angles
- Photo stops are frequent, but the tour still keeps a steady pace
- Downtown orientation includes Queen Street and heritage buildings so you’ll know where to roam next
A half-day Auckland loop that actually helps you plan
Auckland is one of those cities where distance surprises you. Neighborhoods feel spread out, and the best views sit up on hills or out toward the water. This tour is designed to fix that problem quickly: you cover a lot of the map, but you also get enough context to make smart choices for the rest of your trip.
The best part is the balance of viewpoints and streets. You’ll do Harbour Bridge drive-and-photo moments, then you’ll roll through suburbs with their own vibe—Victorian-era streets, shopping areas, and coastal outlooks. By the time you’re back by the Ferry Building, you’ll have names in your head (not just photos on your phone).
And yes, the weather can mess with Auckland. The upside is that your guide can keep the experience moving, including adapting to get you the most useful, sheltered highlights when conditions turn rough.
You can also read our reviews of more city tours in Auckland
Where you meet: Ferry Building makes the start simple
The main pickup is alongside the Ferry Building on Queens Wharf, in the pick-up & drop-off area. If you’d rather not navigate a transit meetup point, you may be able to use one of the four central pick-up locations—just line up your exact address. Some guides can also coordinate a hotel pickup if it’s convenient.
Why this matters: the Ferry Building location is a solid anchor. It’s central, easy to find, and close to plenty of walkable downtown services. That reduces the stress on a day when you’re trying to get outside and start exploring.
The tour ends back at the same meeting point, with an option to drop you off at your downtown hotel if you’re staying close.
Waterfront Auckland: Viaduct Harbour to Westhaven Marina

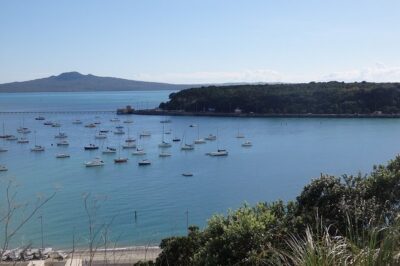
Right away, you’ll head along the downtown waterfront, passing Viaduct Harbour—one of Auckland’s best-known “going out” areas. This is where you’ll feel the city’s maritime energy: boats everywhere, water traffic, and that America’s Cup-era connection to sailing history.
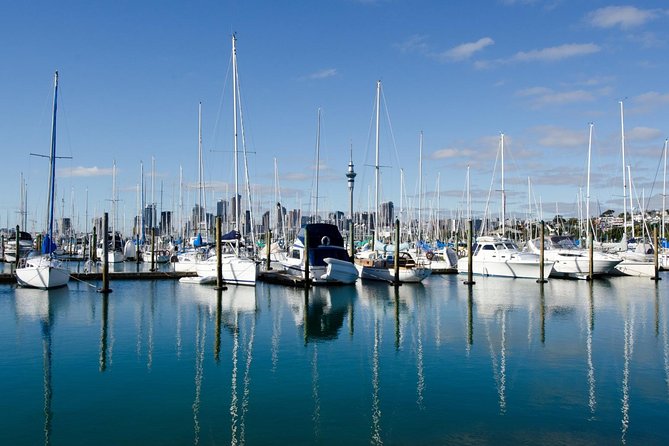
Then you’ll stop at Westhaven Marina, described as the largest marina in the Southern Hemisphere. This is one of those places where your photos come out better than you expect, because you’re looking across multiple layers of water, harbor structures, and big ships.
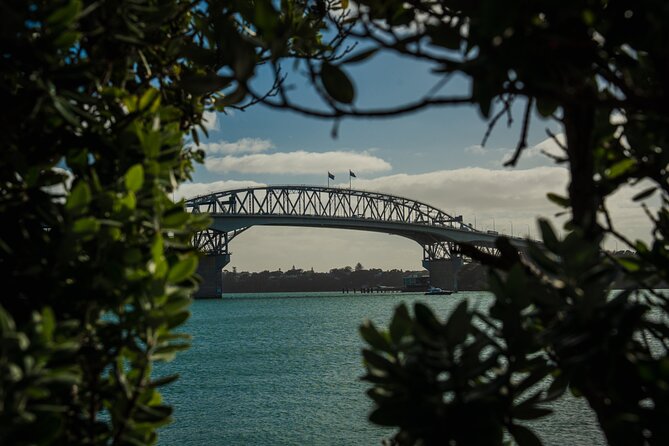
You’ll also get the kind of bridge-and-harbor framing that you can’t easily recreate on your own unless you already know where to stand. Sometimes you might even catch bungy action in the distance—if you’re there when the timing works out.
A small note on the pacing: the stops here are short. That’s the trade-off for covering so much in one half-day. If you’re the type who loves to linger, use the time for quick photos, then remember this stop as a “come back later” candidate.
Crossing to the North Shore: Bridge views and the city across the water
After Westhaven, you travel over the Harbour Bridge toward the North Shore, heading toward Northcote Point. This section is about changing the angle on Auckland.
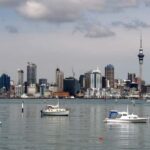
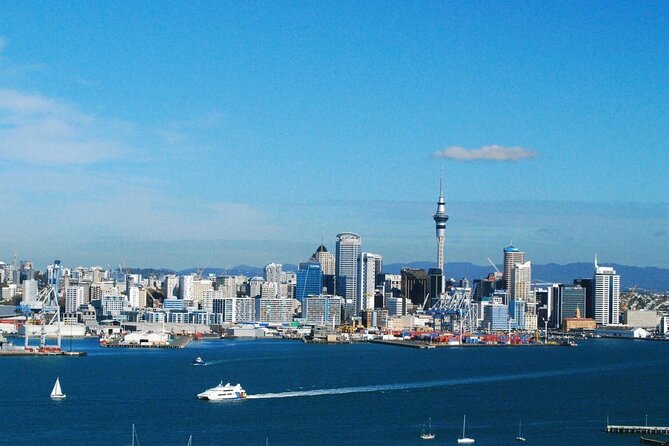
From the water’s edge, Auckland can look like it’s built to be photographed. The North Shore drive gives you a new perspective on the harbor layout, and it sets you up for the viewpoint stops that follow.
If your mental map of Auckland is currently just downtown plus “the rest,” this is where the city starts to make sense.
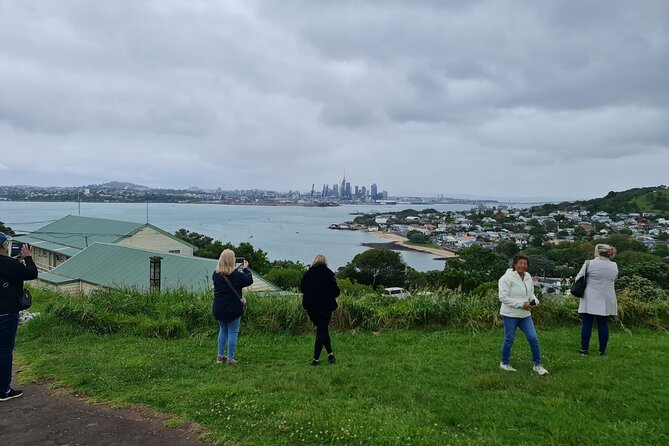
Little Shoal Bay Reserve: the best “Auckland spread” photo

Next comes Little Shoal Bay Reserve in Northcote Point. This is one of the key photo moments of the day: it’s positioned for views across the harbor back to the city.
You’ll have about 10 minutes here. That sounds brief, but it’s usually enough time to find a spot, take the shot, and reset before the next leg. If the light is good, this stop alone can create that “I get it now” feeling—Auckland looks like Auckland from this angle.
Practical tip: bring your phone camera strap or keep your hands free. Viewpoints can be a little windy near the coast, and you’ll want to focus on composition, not balancing gear.
You can also read our reviews of more tours and experiences in Auckland


Northcote coffee option (but no formal tea break)
There’s an optional coffee stop in Northcote. Importantly, this tour doesn’t do a formal morning or afternoon tea/coffee break. The idea is to keep you seeing more of Auckland instead of sitting still too long.
If you want caffeine, plan to buy takeaway drinks on your own. This is also a good moment to use your bathroom needs beyond Mt Eden—depending on what’s available nearby at the time of your stop.
Who this fits: if you’re traveling with a tight schedule and you’d rather keep moving, you’ll appreciate the “no long break” rhythm.
Ponsonby and Parnell: architecture, shopping, and the story behind the streets
After the North Shore viewpoint sequence, you swing through inner suburbs that feel more character-driven than downtown.
You’ll pass Ponsonby, known for older buildings and a strong mix of shops. It’s one of those areas where you can picture people strolling, popping into independent stores, and turning a casual afternoon into something worth remembering.
Then you’ll go through Parnell, including a quick drive past the Rose Gardens. If flowers are in bloom, you may be able to snap a few photos. If they aren’t, you still get the streetscape and the neighborhood feel.
Why I like this segment for visitors: these are not just stops for selfies. These are the places that turn into your day two plans—where you’ll shop, grab lunch, and wander without needing a detailed itinerary.
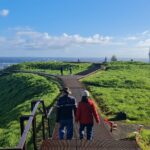
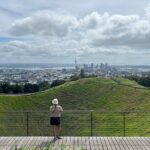
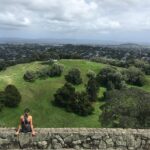
Mt Eden summit: the walk that turns a tour into a memory
Mt Eden is the signature payoff. You’ll have about 30 minutes at the summit area, and there’s a bathroom onsite. The walk from the parking lot to the summit is about 5–10 minutes each way, so it’s manageable, but it’s still a real walk.
From up there, you’re high above the city, looking down across Auckland’s layout and the harbor direction you just explored. It’s one of the clearest ways to understand the city’s geography in a short time.
This stop is also a great “choose your photo angle” moment. Move a bit, find the best spot for the horizon and harbor lines, and don’t just shoot from where you first arrive.
Possible drawback: if you’re traveling with mobility limits or you prefer zero walking, this is the one part of the day that may feel like a commitment. Everything else is mostly drive-by or quick photo stops.
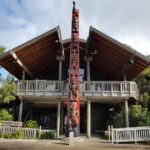
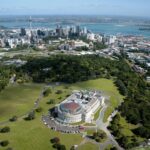
Auckland Domain and Auckland Museum: see the area, skip the extra time
You’ll drive through Auckland Domain and past Auckland Museum. The tour intentionally doesn’t stop for a museum visit because you’d likely need several hours to do it properly.
That’s actually smart planning if you only have half a day. You get an orientation pass—so you’ll know where the museum is and can decide later—without losing your entire schedule.
If you’re a museum-first traveler, you can use this moment as a cue. Come back another day and do the museum when you’re not rushing between viewpoints.
The coastal drive: Ohaku Bay, Mission Bay, Kohimarama, and St Heliers
Now the tour turns scenic in a different way. You’ll head back toward the waterfront, passing along coastal stretches like Ohaku Bay, Mission Bay, and Kohimarama Beach, then continuing toward Saint Heliers.
This part of the day is slower in feel even if the driving pace stays efficient. You’re collecting impressions: shoreline colors, beach landscapes, and the way the city hugs the water.
If you’ve been thinking Auckland is just city buildings and harbors, this drive corrects that quickly. It shows you why locals treat the shoreline as everyday life.
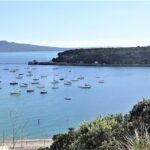
Achilles Point: the islands-and-city combo photo
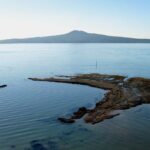
At Achilles Point in Saint Heliers, you’ll get another highlight photo stop—around 10 minutes. This viewpoint focuses on the Hauraki Gulf islands plus a distant look back toward Auckland City.
It’s a nice complement to the North Shore views. Instead of only seeing the city across the harbor, you see the harbor as part of a bigger island picture.
Again, this is short by design. Use it to get your “second best” viewpoint photo, not to plan a long beach day. You can always add beach time on your own afterward.
Downtown orientation: Symonds St, Queen Street, and heritage landmarks
Next you drive along Symonds Street and past the University of Auckland, then into downtown. Your guide points out key places like the Auckland Art Gallery and guides you through central streets such as High Street and O’Connell Street.
Then you’ll hit Queen Street, the main shopping spine of the city. You’ll also pass heritage buildings like the Auckland Town Hall and the Civic Theatre.
This segment is less about stopping and more about helping you navigate. After a tour like this, you don’t feel lost when you step off the bus. You know which streets are the core, and you can choose whether your next step is shopping, a museum, a café, or just walking.
It’s also a handy way to learn the city’s “layers”: modern center vibes, older Victorian buildings nearby, and the waterfront just a short reach away.
Live guide energy: when humor and history make the ride worth it
Auckland City Tours runs the day with live commentary from a professional guide and an air-conditioned vehicle. That matters because you’re spending hours in transit—so the information should feel like a conversation, not a lecture.
Guides such as Josh, John, and Paul are repeatedly noted for a mix of humor and local storytelling. You’ll hear city history tied into what you’re seeing, including the maritime culture threads that connect Auckland’s harbor life to its broader development.
You’ll also get help with photo opportunities. Several guides are attentive about where to stand so you don’t end up with the wrong angle for your shot.
And if the weather turns, the best guides shift gears. The goal is not just to get you through the route—it’s to keep giving you usable sights even when conditions aren’t perfect.
How much you pay: $46.54 for a full-value half day
At $46.54 per person for roughly 4 to 4 hours 10 minutes, the value comes from what’s included rather than from what’s not. You’re paying for an air-conditioned ride, a live guide, and a structured plan that would take time (and guesswork) to assemble on your own.
You also get multiple viewpoints—Mt Eden, North Shore reserves, Westhaven Marina, Achilles Point—without having to coordinate ferry plans, parking, or backtracking between distant areas.
A smart way to judge value: think about the cost of your time. If you try to do this loop solo, you may spend the same money on transport and parking, then lose time figuring out where to stop and what order makes sense. This tour handles the sequencing.
Also, since many stops are effectively photo pull-offs rather than paid entries, your money goes mostly to guiding and getting you into the right spots.
Who should book this tour (and who might prefer something else)
This is a great fit if you:
- Want a fast orientation to Auckland’s geography (harbor + hills + neighborhoods)
- Have a short stay and want the “must-see” viewpoints without planning a route
- Like photo stops and short walks rather than long museum or beach sessions
- Appreciate live local commentary while you ride
It might not be ideal if you:
- Want long time at one place (like a full museum visit)
- Prefer zero walking at all (Mt Eden includes a 5–10 minute walk each way)
- Are expecting a slow, sit-down experience at cafés as part of the tour
Should you book this Auckland City Sightseeing Tour?
If you’re trying to make the most of limited time, yes—book it. This is one of those half-day tours that doesn’t just hand you a checklist. It helps you understand how Auckland fits together: harbor angles, volcanic viewpoints, and the inner-city neighborhoods where you’ll want to return.
I’d book it especially if you’re arriving and you want a clear sense of where things are. Even if you don’t plan to revisit every stop, you’ll leave with a working mental map.
Save one day afterward for your favorites—whether that’s Mission Bay for beach time, Mt Eden again for a different light, or the museum you passed on the way. This tour is the setup; the rest of your trip is what you make from it.
FAQ
Where is the main meeting point?
The main pickup point is alongside the Ferry Building on Queens Wharf in Auckland Central.
How long is the tour?
It runs about 4 hours to 4 hours 10 minutes.
How many people are on the tour?
The group is limited to a maximum of 18 people.
What are the key stops during the day?
You’ll see the Ferry Building area, Viaduct Harbour views, Westhaven Marina, Harbour Bridge drive moments, North Shore viewpoints at Little Shoal Bay Reserve and Achilles Point, Mt Eden summit, and downtown streets including Queen Street.
Is the tour guide commentary included?
Yes. You’ll have a professional guide with live commentary on an air-conditioned vehicle.
Is there a bathroom stop?
There are bathrooms at Mt Eden.
Do you include coffee or meals?
There is an optional coffee stop in Northcote, but it’s not described as a formal tea/coffee break, so you should expect to buy takeaway yourself if you want it.
Can I cancel for a full refund?
Yes. Free cancellation is available up to 24 hours in advance for a full refund.
Do children or strollers have any requirements?
Children must be accompanied by an adult, and strollers must be foldable.