Auckland in a few hours, minus the crowds. This half-day tour packs big viewpoints and story-driven stops into a tight route, with free pickup and drop-off for CBD hotels and a small max group of 10. You’ll get local context as you move through Auckland’s harbor edges, volcanic heights, and standout architecture without the stress of planning every turn.
Two things I really like are the small-group feel and the way the guide turns each location into something you can actually picture, not just snap. I also appreciate that the schedule hits multiple “wow” moments while keeping entries simple since stops are listed as admission ticket free, so you’re not scrambling for costs on the spot.
One thing to consider: it’s a half-day with several short visits, so the pace is brisk. If you like to linger for long photos or quiet time, you’ll want to go with the right expectations.
In This Review
- Key highlights
- Getting your bearings fast in Auckland’s best viewpoints
- Price and what you’re really getting for $105.50
- Pickup, small-group pacing, and how the day flows
- Stop 1: Auckland Harbour Bridge views with the city’s core story
- Stop 2: North Head Historic Reserve and coastal defense on the edge
- Stop 3: Mount Eden summit views from Auckland’s highest volcano point
- Stop 4: Winter Garden at Auckland Domain for 1913-era garden calm
- Stop 5: Holy Trinity Cathedral and Pacific-Gothic style you won’t expect
- Weather and plan B: how the guide keeps the day working
- Who this tour suits best (and who should pick something else)
- Practical notes that help you enjoy every stop
- Should you book this Auckland half-day tour?
- FAQ
- How long is the Auckland Hidden Gem Half Day Tour?
- What’s the tour price?
- Is pickup and drop-off included?
- How many people are on the tour?
- Are admissions included for the stops?
- Is lunch included?
- What fitness level is required?
- Can I cancel for a refund?
Key highlights
- Up to 10 people keeps the tour personal and easy to ask questions
- CBD hotel pickup and drop-off saves you time and hassle
- A tight mix of iconic and off-mainstream stops in about 3–4 hours
- Mount Eden views from the highest volcano point in Auckland’s 52-volcano setup
- Auckland Domain Wintergardens culture stop with a 1913 origin story
- Pacific-Gothic cathedral design at Holy Trinity Cathedral, plus an added church glimpse
Getting your bearings fast in Auckland’s best viewpoints
Auckland can feel like a city of viewpoints. One minute you’re looking out over water, the next you’re up on volcanic ground, and then you’re back among gardens and heritage buildings. This tour is designed for that exact rhythm: you cover a lot without feeling rushed in the usual “bus-and-bored” way, because you’re moving in short bursts and hearing the why behind each place.
The time window matters. At roughly 3 to 4 hours, you’ll get a satisfying overview without eating your whole day. That makes it a strong choice if you’re staying centrally, have jet lag, or want something scheduled that still leaves room later for independent wandering.
The other big value is that it’s built around a story-led guide. Not just facts. You get the reason the harbor matters, the defense logic behind North Head, why Mount Eden is a real landmark, and how architecture in the city shows up in unusual ways. It’s the kind of context that helps you understand what you’re seeing once you step out on your own.
You can also read our reviews of more tours and experiences in Auckland.


Price and what you’re really getting for $105.50

At $105.50 per person, this isn’t the cheapest way to “see Auckland.” But it also isn’t overpriced for what you get—especially because several stops are listed as admission ticket free and pickup/drop-off is included for CBD hotels.
Here’s how I’d think about the value:
- You’re paying for a guide who connects the dots across multiple areas of the city.
- You’re not paying for a string of paid attractions at each stop (the tour’s stops are presented as free admissions).
- You’re also buying back your time by having the route handled and the group kept small.
So if you’d otherwise spend time researching, mapping, and paying for transport between scattered points, the cost starts to make more sense. For couples and solo visitors, the group size is also a plus—you’re not getting treated like a number.
Pickup, small-group pacing, and how the day flows
This tour is set up to run 7 days a week, and it’s capped at maximum 10 travelers. That small number is what keeps the stops from feeling like a stampede. You get enough time to ask questions, and the guide can keep an eye on the group without the usual choreography.
The pickup and drop-off part is a big deal in Auckland, where getting around can eat into daylight. Being collected from CBD hotels (and dropped back afterward) means you don’t have to coordinate transit while you’re also trying to enjoy the view stops.
Timing is also flexible enough to handle real-life weather. In one guided experience, the guide adjusted for rain by swapping in Auckland Museum as an alternative when needed. Later, when the sun returned, the guide managed an extra stop to include Mt Eden—the best kind of plan change, because it doesn’t feel like you’re losing the day.
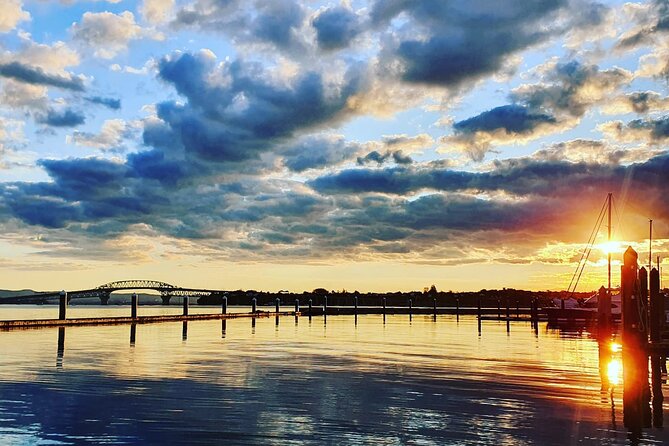
Stop 1: Auckland Harbour Bridge views with the city’s core story
The Auckland Harbour Bridge is more than a photo spot. It’s described as a crucial piece of infrastructure—standing across the Waitematā Harbour and connecting the central business district to the rest of the city’s harbor side.
When you’re right there, you start seeing the city through infrastructure logic: Auckland grew around water access, and the bridge became a key connector. Your guide’s role is to translate that into something you feel while looking out—why the bridge is where it is, why that harbor line matters, and why Auckland’s layout makes sense when you view it from this corridor.
Why you’ll like this stop: even in a short window, the bridge delivers immediate context and a clean sense of scale—boats, water traffic, and the city shape line up in a way that’s hard to recreate from a casual walk.
Possible drawback: since it’s a quick stop (about 30 minutes), you’ll get to see it, but you won’t have long to linger for deep photo sessions.
Stop 2: North Head Historic Reserve and coastal defense on the edge
North Head Historic Reserve (Maungauika) sits at the harbor entrance, and that location is the whole point. This spot matters because it was chosen for coastal defense. The details shared here include the fears of a Russian invasion in the 1880s, which helped spur the building of fortifications and defensive structures.
This isn’t just a “look at the view” stop. It’s a chance to read the coastline like a map: the harbor mouth, the angles, and the strategic value of controlling what comes in and out.
You’ll also get that rare feeling of being near the water but understanding it as history, not just scenery. The reserve helps you connect Auckland’s present harbor life to the way people once expected danger at sea.
Keep expectations realistic: the visit runs around 1 hour, so think of it as a guided orientation to the site, not an all-day historical deep read.


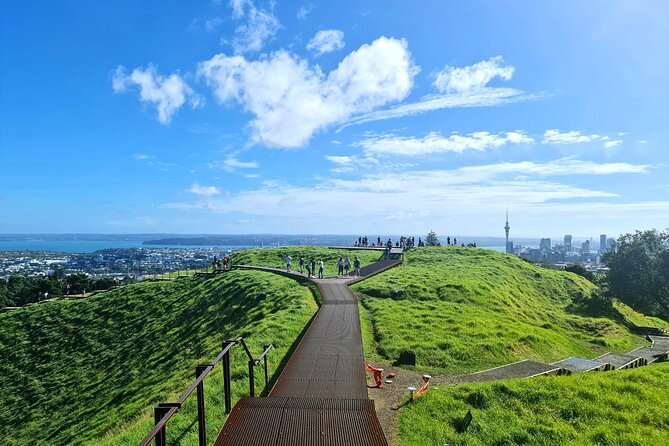
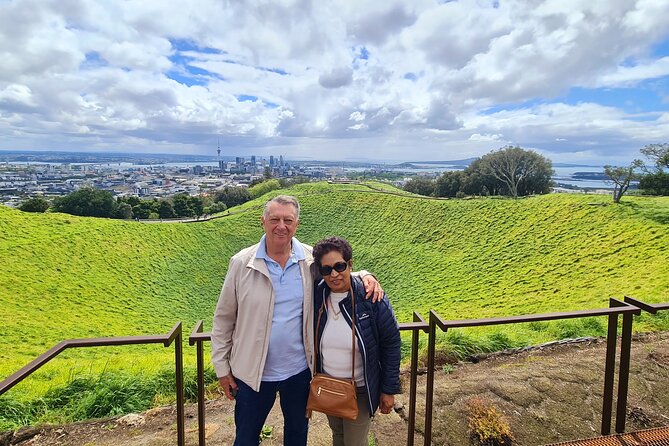
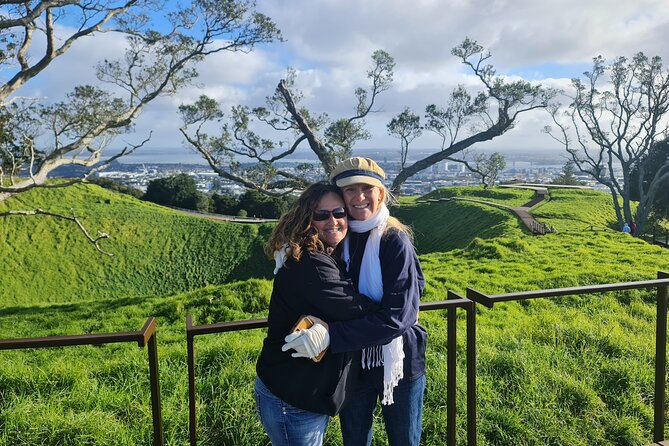
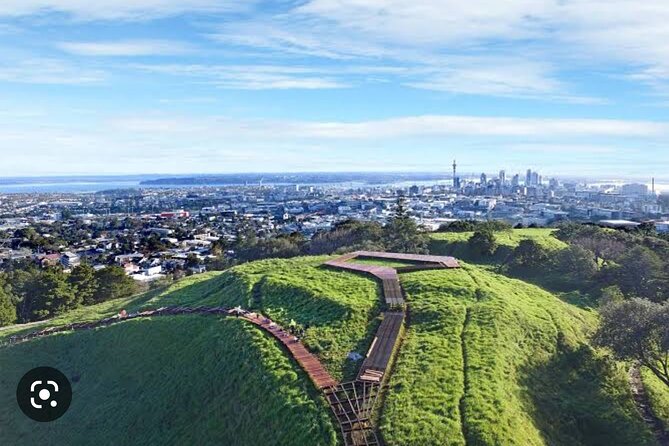
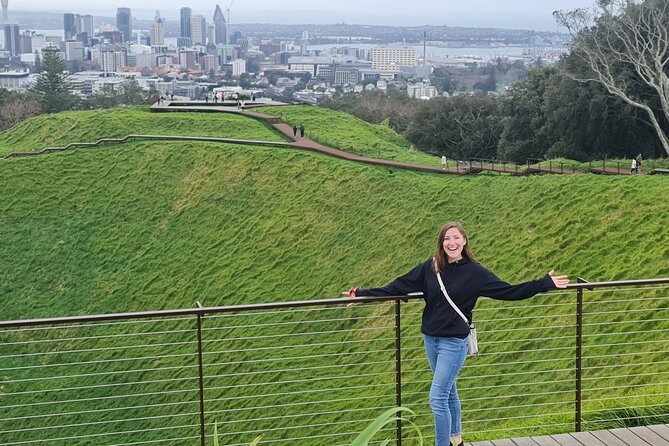
Stop 3: Mount Eden summit views from Auckland’s highest volcano point

Mount Eden is where Auckland turns into a viewpoint party—minus the chaos. It’s described as the highest volcano among Auckland’s 52 volcanos, and the summit height is given as 196 meters. From up there, you get spectacular views across the city and both harbors.
This is one of those stops where the guide’s context makes the photos better. Instead of just pointing at landmarks, you understand the volcanic geography that helped shape Auckland’s neighborhoods and how the city sits within a volcanic field.
The practical part: the stop is about 1 hour, so you can take in the view, walk a reasonable circuit, and still keep the day moving. If you have moderate fitness (the tour calls for that), you’ll likely be comfortable with the terrain pace.
What I’d do: wear shoes you trust on uneven ground. You don’t need hiking boots, but you do want stable footing at a viewpoint volcano.
Stop 4: Winter Garden at Auckland Domain for 1913-era garden calm
After volcano views, you shift gears into quiet green. The Auckland Domain Wintergardens opened in 1913, and that date gives the stop a sense of continuity—this garden has been a public pause spot for a long time.
What you’ll notice is the plant focus. The tour description points to a large collection of chrysanthemums, plus showcases of rare plants (the details are partially truncated, but the emphasis is clearly on noteworthy collections). This is the kind of stop that makes sense even if you’re not a hardcore gardener. The guide’s story helps you connect blooms and design to why they mattered to visitors back when the gardens opened.
The time block is short—around 30 minutes—but it’s enough to see the main features and get a sense of why people keep returning.
Tip for your visit: take a slower pace than you think you need. In a short tour, you’ll feel tempted to rush. Don’t. The garden is where you can reset your senses before the architecture stop.
Stop 5: Holy Trinity Cathedral and Pacific-Gothic style you won’t expect
Holy Trinity Cathedral is the standout architecture stop on this tour. It’s described as the world’s only architectural example of a Pacific-Gothic cathedral. That’s a huge claim—and when you’re there, it helps you look past “pretty church” and instead notice design choices shaped by cultural and regional influences.
Your guide will point out the sense of grandeur and beauty you feel quickly upon arrival. There’s also mention that you can see St. Mary Church, made almost exclusively with a certain material (the text is incomplete, so I’ll keep it general). Either way, the point is that the cathedral complex gives you more than one architectural moment, so you aren’t wasting time with a single building photo and done.
This stop runs about 30 minutes, so it works well even if you’re not planning a longer church visit. It’s also a nice contrast after outdoor viewpoints and garden paths.
Weather and plan B: how the guide keeps the day working
Auckland weather loves drama. One of the best things about the guided experiences I’ve seen described is how the route can bend without losing value.
On a rainy day, the guide adjusted and brought the group to Auckland Museum as an alternative. Then, when conditions improved, the guide extended the day to still include Mount Eden. That tells you something important: the guide isn’t treating the day like a script. They’re protecting your experience.
So if you’re booking this as your one “must-do Auckland overview,” you’ll feel better knowing there’s a real-weather strategy. You might not get every stop in the exact same order, but the tour aims to keep the core Auckland highlights covered.
Who this tour suits best (and who should pick something else)
This half-day format is ideal if you want:
- A fast overview of Auckland with multiple major stops
- A guide who explains the background so it feels meaningful
- A small group experience with less waiting and less crowding
It also fits well if you’re staying in the CBD and don’t want to build a transport plan. Pickup and drop-off makes the whole thing easier.
It may not suit you as well if:
- You dislike short stops and prefer long, slow exploration
- You need lots of downtime between viewpoints
- You’re traveling with a child under 8, since the program can’t be booked for under-8 participants
Fitness-wise, the tour asks for moderate physical fitness. That usually means you should be comfortable with walking time at viewpoints and garden paths, but it’s not presented as extreme hiking.
Practical notes that help you enjoy every stop
A few small things will make the day smoother:
- Wear weather-ready clothes. Even if it looks fine, Auckland can change quickly.
- Bring water and a light layer. You don’t have a long lunch window built into the tour.
- Plan for a simple day out: lunch isn’t included, and tips aren’t included either.
The tour also uses a mobile ticket, which is convenient. If you’re the kind of traveler who likes to be organized, you’ll appreciate that.
And since it’s near public transportation, you’re not completely stuck if you have a question about where to meet. Still, the point is the pickup makes life easier.
Should you book this Auckland half-day tour?
I’d book it if you want a structured Auckland intro that still feels human. The small max 10 group size, free CBD pickup, and stop choices spanning harbor, defense history, volcanic viewpoints, gardens, and distinctive architecture add up to real value for a short visit.
I’d think twice if you hate quick stop pacing or want a slow, deep exploration of just one area. In that case, a longer neighborhood-focused day might match your style better.
FAQ
How long is the Auckland Hidden Gem Half Day Tour?
It runs about 3 to 4 hours.
What’s the tour price?
The price is $105.50 per person.
Is pickup and drop-off included?
Yes. Free pickup and drop-off are offered at all CBD hotels.
How many people are on the tour?
The group size is capped at a maximum of 10 travelers.
Are admissions included for the stops?
Admission tickets for the listed stops are shown as free.
Is lunch included?
No. Lunch is not included.
What fitness level is required?
The tour indicates travelers should have a moderate physical fitness level.
Can I cancel for a refund?
Yes. You can cancel up to 24 hours in advance for a full refund.