REVIEW · AUCKLAND
Private Auckland City Tour For Small Group in a luxury vehicle.
Book on Viator →Operated by Black Car Transfers & Tours · Bookable on Viator
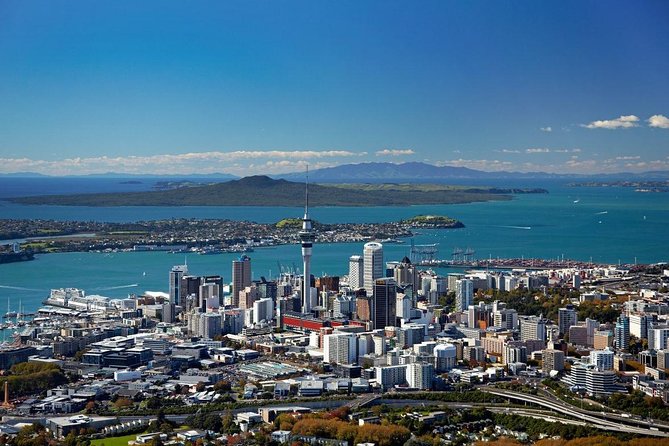
Auckland can feel spread out and slightly chaotic on your first day. This private tour puts you in a chauffeured luxury vehicle and lets you hit big sights in about 5 hours.
What I like most is the calm, tailored pace. You get snacks and bottled water for the ride, plus onboard WiFi, so you’re not just commuting between viewpoints—you’re actually making the day easier.
One consideration: the Auckland Museum stop doesn’t include admission, and there’s no lunch or coffee/tea built in. You’ll want to plan for that if you’re hungry or caffeine-dependent.
In This Review
- Key Things That Make This Auckland Tour Worth Your Time
- A Five-Hour Auckland Plan That Helps You Get Your Bearings
- Luxury Pickup and the Comfort Factor in Auckland Traffic
- Stop by Stop: What You’ll See and Why It Matters
- Mount Eden (Maungawhau): Skyline Views Fast
- Auckland Museum and the Winter Gardens: A Green Pause
- Bastion Point: Harbor Views and Māori Heritage
- Tamaki Drive and Mission Bay: The Classic Auckland Bay Drive
- Parnell: Rose Gardens and a Pretty Village Stop
- Auckland Downtown to West Haven Marina and the Harbour Bridge
- St Heliers and Archilles Point: Another Big-View Section
- Devonport: Village Vibes and North Head Views
- Little Shoal Bay Reserve: Quick Views of Downtown
- Price and Value: What $713.66 Per Group Really Buys
- How to Get the Most Out of Each Stop
- Who This Private Auckland Tour Is Best For
- Should You Book This Auckland City Tour?
- FAQ
- How long is the Auckland city tour?
- What is the starting time?
- Is pickup offered from places like the airport or hotels?
- Is this tour private?
- Are meals included?
- Is admission included for all stops?
Key Things That Make This Auckland Tour Worth Your Time

- Small-group private touring in a luxury, chauffeured car for up to 2 people
- Snacks, bottled water, and WiFi onboard to keep the ride comfortable
- A skyline-and-seaside mix: Mount Eden views plus harbor towns like Devonport
- Free outdoor stops at multiple viewpoints, with museum admission as the main extra cost
- Guide flexibility, including detours for extra garden time when that’s what you want
A Five-Hour Auckland Plan That Helps You Get Your Bearings
This tour is built for the exact moment you’re in right now: you land in Auckland (or you’re here on a tight schedule), you’re curious, and you don’t want to waste half a day figuring out routes, parking, and which hills are worth the walk.
The big win is that you still get variety. You’re not stuck doing one neighborhood loop. Instead, you bounce from elevation and city views (Mount Eden) to water views (Bastion Point and the harbor areas) and then into classic Auckland “look and linger” spots like Parnell and Devonport. It’s the kind of route that helps you understand how the city is put together: hills behind, water everywhere, and neighborhoods that feel like different cities.
Because it’s private and the itinerary is customizable, the day can feel less like a checklist. In fact, I’ve seen this tour’s guides adjust the route for guests who already covered parts of Auckland or who want slightly more off-the-beaten-path viewpoints. If you’re the type who likes options, this format is a good match.
You can also read our reviews of more city tours in Auckland


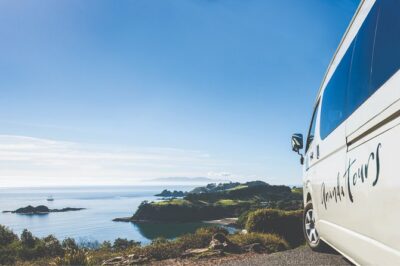
Luxury Pickup and the Comfort Factor in Auckland Traffic
A chauffeured car sounds fancy, but in Auckland it’s practical. The city has enough hills and busy roads that self-driving on day one can get tiring fast, even if you’re a confident driver.
With pickup available from central hotels, ports, or the airport, you can start moving immediately instead of hunting for a rental car desk or juggling luggage. The tour also runs with a mobile ticket, so you’re not scrambling with paperwork once you’re on the ground.
Inside the vehicle, you get WiFi onboard plus bottled water and snacks. That matters more than it sounds. Auckland sightseeing includes short walks and viewpoint time, and those “small waits” add up. Having refreshments on board helps you keep energy steady and not start the next stop already thinking about lunch.
One detail that shows how serious the service can be: guides have been flexible about comfort needs in the car, including seating adjustments for motion sickness. If that’s relevant for your group, this kind of attention is worth paying for.
Stop by Stop: What You’ll See and Why It Matters
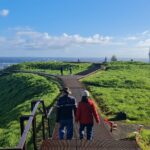
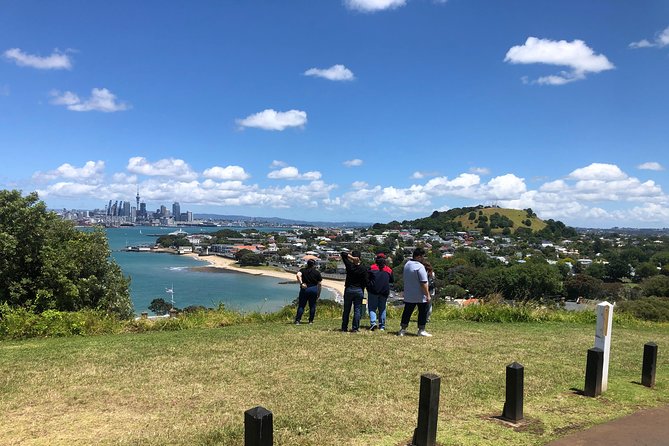
Mount Eden (Maungawhau): Skyline Views Fast
The day starts at Maungawhau / Mount Eden, one of Auckland’s best-known maunga (volcano mountains). You’ll get about 20 minutes here, and admission is free.
This is a quick way to grasp Auckland’s layout. The summit viewpoints (reachable by walkways) let you see the city spread below, with the Waitematā Harbour area in the mix. It’s the kind of first stop that helps the rest of the tour “click” in your mind, because once you’ve seen the city from above, every later drive makes more sense.
How to make this stop work for you: wear shoes you’re comfortable walking in. Even if you don’t go far, you’ll want to step into the main viewpoint areas for photos.
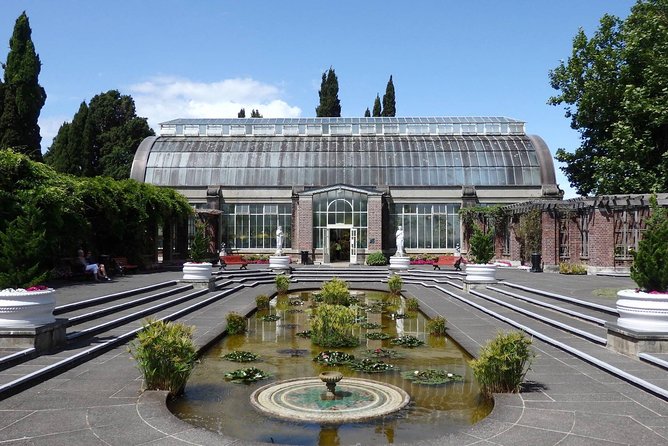
Auckland Museum and the Winter Gardens: A Green Pause
Next up is Auckland Museum with a scenic drive through the Auckland Domain. You’ll get about 15 minutes at the museum area, and here’s the key point: admission is not included.
Even with limited time, this stop is useful because it breaks the rhythm. After viewpoints, you get a more sheltered, garden-style change of pace. The Winter Gardens are part of the visit, and they give you a pleasant reset before the harbor-focused stops.
Drawback to know: since the museum admission isn’t included, you’ll want to be mentally ready to pay for entry if you plan to go all the way in. If you’d rather skip museum time, the rest of the itinerary still carries the tour, but you may want to ask the guide about your priorities before you arrive.
You can also read our reviews of more private tours in Auckland
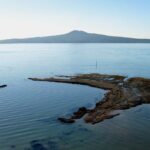
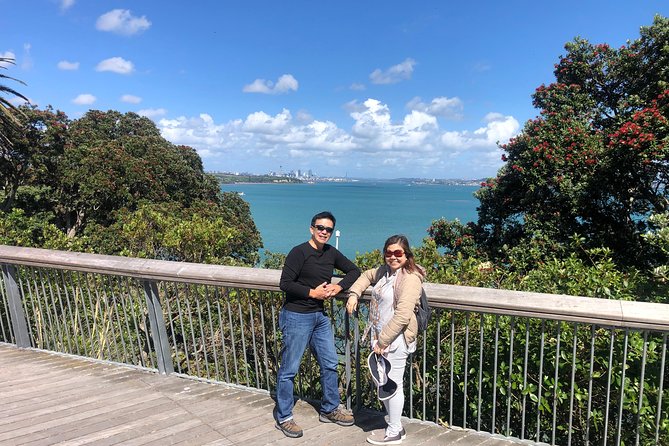
Bastion Point: Harbor Views and Māori Heritage
Then you’ll stop at Bastion Point for about 10 minutes. Admission here is free.
Bastion Point is known for Māori history and for the wide-open harbor views, including a line of sight toward Rangitoto Island. This is a good stop when you want photos that aren’t just “city from above,” but instead “harbor as a living backdrop.”
Because it’s brief, it’s best for quick wandering and photo time rather than long exploring. Still, it’s one of those places where even a short stop feels meaningful.
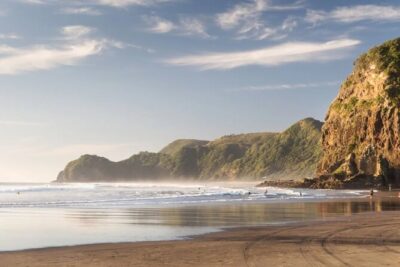
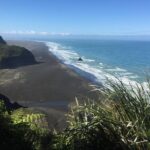
Tamaki Drive and Mission Bay: The Classic Auckland Bay Drive
After Bastion Point, you move along Tamaki Drive. You’ll have around 15 minutes, and this is largely a drive with a chance to look toward Mission Bay.
This is where you get the postcard Auckland feeling: bay, water, and that easy seaside rhythm. The tour description also includes time to take a walk at the beach or grab a beverage at a local café. Coffee isn’t included on the tour, but Tamaki Drive is a sensible place to buy a drink if you’re ready for a break.
Small practical note: if you’re visiting in cooler weather, bring something light to cover up. Bay air can be a little sharper than you expect.
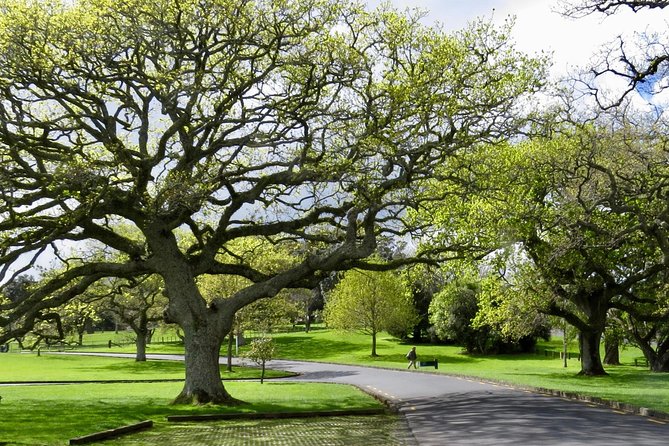
Parnell: Rose Gardens and a Pretty Village Stop
Next is Parnell, with about 10 minutes and free admission for the stop. You’ll drive through the village and include a stop at the Parnell rose gardens.
Parnell works well as a “slow down” moment. It gives you a more residential, charming feel compared with the bigger view points. Rose gardens are especially satisfying if you like colorful, photo-friendly spots, and a short stop keeps the whole day from turning into one long march.
Because this is time-limited, you’ll likely want to pick what you care about: roses and strolling, or just a quick photo sweep.
Auckland Downtown to West Haven Marina and the Harbour Bridge
At this stage, you’ll be driven through Auckland Downtown and toward the west haven marina, where you’ll see yachts and sailboats. The route also brings you to the Auckland Harbour Bridge area.
This is one of those “see it while you’re traveling” segments. It isn’t framed as a long stop for climbing and exploring, but as a visual connection between the city core and the water world.
If you’re the type who likes understanding the city from multiple angles, this bridge-and-marina stretch helps you connect the dots between viewpoints and real-life harbor activity.
St Heliers and Archilles Point: Another Big-View Section
Your tour continues with St Heliers, including about 10 minutes and a stop at Archilles point.
This area is all about views: downtown Auckland, and then outward toward Waiheke and Rangitoto Islands. It’s a strong contrast with the earlier stops, because now you’re looking outward and framing the city across water rather than only seeing the city footprint.
Again, timing is short, so you’ll want to step out, look around, take photos, and be ready to move.
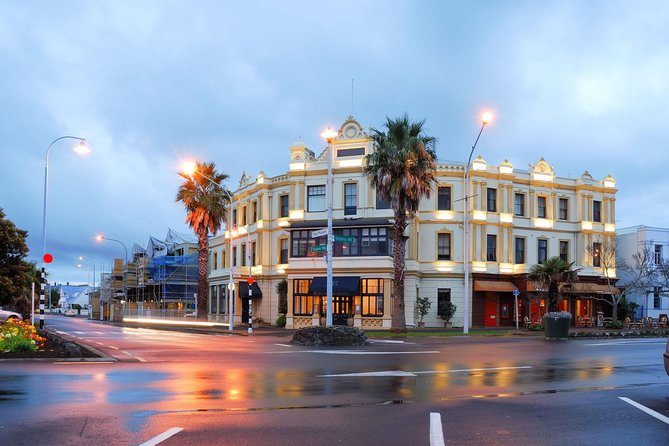
Devonport: Village Vibes and North Head Views
Then comes Devonport for about 30 minutes, with admission free for the stop. This is one of the best segments for atmosphere.
Devonport is described as a relaxed bayside village with cafés and seafood restaurants, and classic Kiwi pub energy too, including fish and chips spots. The centerpiece viewpoint area connects to the volcanic cone of North Head, with spectacular views toward Rangitoto Island.
This is a good place for people-watching and casual wandering. You can also use this longer stop to buy a coffee or a snack you like, since the tour itself doesn’t include meals.
Tip: if your group cares about views, spend the extra couple of minutes getting to the best lookout angle rather than staying at the first obvious viewpoint.
Little Shoal Bay Reserve: Quick Views of Downtown
Finally, there’s a brief stop at Little Shoal Bay Reserve for about 10 minutes, again with free admission.
This is a fast, photo-friendly finale: views of downtown Auckland. It’s a nice closing act because it ties back to the earlier harbor-and-city framing and gives you one more angle before the day ends.
Price and Value: What $713.66 Per Group Really Buys
The price is $713.66 per group (up to 2 people), and the tour runs about 5 hours. That means you’re paying for a private luxury car, chauffeuring, a guide, and the time saved by not driving yourself.
If you split the cost with a second person, it becomes far more reasonable. Even if you’re traveling as a couple, it often ends up competing well with the cost of taxis or rides plus the inconvenience of planning.
Here’s what you’re really buying:
- Time control: instead of spending your morning mapping routes, you’re already at Mount Eden.
- Comfort: WiFi, bottled water, snacks, and pickup from the places you’re most likely to be.
- Flexibility: your guide can adjust the itinerary to your interests, including garden time and detours when you’ve already seen certain areas.
Worth noting: the biggest possible extra cost is museum admission (Auckland Museum is not included). Lunch and coffee/tea aren’t included either, so you’ll want to budget a bit for food on the day.
Still, as a first Auckland orientation tour, this is one of those purchases that can make the rest of your trip easier. After you’ve seen the city from multiple angles, picking where to spend your free time becomes a lot simpler.
Also, since the tour is often booked about 47 days in advance, it can help to lock in your time slot earlier—especially if you want the 9:00 am start.
How to Get the Most Out of Each Stop
A good private tour is mostly about pacing, and you’ll do better if you plan for quick transitions.
Bring:
- Comfortable shoes for short walks at viewpoints and garden areas
- A light layer for bay air
- Your camera, but also your patience for short stop timing
Also, think about your priorities before you go. If you care most about views, you might spend more time at Mount Eden and the harbor-point sections. If you like plants and gardens, the museum stop and Parnell rose gardens will likely land well.
If your group has any motion sensitivity, this is the kind of tour where seating accommodations may be possible. It’s worth mentioning needs at pickup.
And one more thing: use Devonport as your food breathing room. Because lunch isn’t included, that longer stop is where you can settle into a meal without rushing.
Who This Private Auckland Tour Is Best For
This is a strong fit if you:
- Want a high-quality first-day Auckland overview
- Prefer not driving in an unfamiliar city
- Are traveling as a couple or two friends who want private attention
- Care about mixing viewpoints and neighborhood atmosphere
- Want a guide who can adjust the day to your interests
It can also work for people with mobility needs because foldable walkers are allowed. If this applies to you, I’d make sure your walker type is compatible with the vehicle steps and your comfort level during viewpoint stops.
If you’re the type who loves deep, slow, museum-heavy days, you might find the museum time short. But if you want orientation and “see it all once,” the structure is built for you.
Should You Book This Auckland City Tour?

Yes, if you want a smooth, private introduction to Auckland in about five hours, with chauffeured luxury comfort, real viewpoint time, and the right mix of neighborhoods.
I’d book it especially if:
- You’re short on time and want the city’s main “wow factors”
- You’d rather spend money on comfort than on the stress of self-driving
- You value a guide who can tweak the route, including garden-focused moments
Skip it or adjust expectations if:
- You’re counting on the museum being fully covered (it’s not)
- You don’t want to plan for your own meals and coffee
FAQ
How long is the Auckland city tour?
It’s about 5 hours.
What is the starting time?
The tour starts at 9:00 am.
Is pickup offered from places like the airport or hotels?
Yes. Transfers can be arranged from the airport, ports, or central hotels.
Is this tour private?
Yes. It’s a private tour/activity with only your group participating.
Are meals included?
Snacks and bottled water are provided, but coffee and/or tea and lunch are not included.
Is admission included for all stops?
Most stops are free, but admission for Auckland Museum is not included.