REVIEW · AUCKLAND
Auckland: Full-Day City Tour
Book on GetYourGuide →Operated by Stevong Travel · Bookable on GetYourGuide
Auckland from above beats any postcard. This full-day Auckland City Tour strings together the best photo stops and quick walks, so you get panoramic city views early and keep your momentum. I especially like the small private group setup in a comfortable vehicle, which makes it easier to ask questions and actually hear the story behind each place.
One possible drawback: the depth of the history can depend on the guide and the day’s language comfort, so if you’re picky about explanations, you’ll want to ask questions right away.
You’ll also get that I-was-here-you’ll-figure-it-out feeling from a good guide, and the reviews back that up with names like Shin and Israel. Sung also stood out by adapting the route so a wheelchair guest could see and admire as much as possible, which is a big deal for how the day flows.
In This Review
- Key highlights at a glance
- Why this 8-hour Auckland loop works for first-time orientation
- The small-group ride: comfortable, but rules matter
- Mt Eden: the city-view opener that sets the tone
- One Tree Hill and Auckland Domain: green-and-city contrast
- Mission Bay lunch break: where the day turns from sightseeing to breathing
- Viaduct Harbor and Harbour Bridge: quick recognition, good photo chances
- Devonport and North Head point: a different Auckland side
- Auckland Museum or Winter Garden: a history snapshot you can afford
- Cornwall Park and seasonal Parnell Garden: green time, route flexibility
- Who will love this tour most
- Price and value: $209 per person, plus what you should budget
- What the guide quality can change on your day
- Should you book the Auckland City Tour with Stevong Travel?
- FAQ
- How long is the Auckland full-day city tour?
- Where is the pickup point?
- What does the tour include?
- Is museum entry included?
- What places are on the itinerary?
- How big is the group?
- Are food and drinks covered?
Key highlights at a glance
- Mt Eden viewpoint with a guided stop plus time to take photos and look around
- A smart loop through One Tree Hill and Auckland Domain to understand how the city is laid out
- Mission Bay break time that turns into lunch and downtime, not nonstop driving
- A scenic drive that covers Auckland Harbour Bridge and the waterfront areas you want to recognize fast
- Devonport and North Head point for a different slice of Auckland, with great sightlines
- Option for Auckland Museum or the Winter Garden, with an entrance ticket cost to budget
Why this 8-hour Auckland loop works for first-time orientation
Auckland can feel like a lot at once: harbors, hills, suburbs, and viewpoints that are just different enough to make you want to hop out every five minutes. This tour is designed for the “get your bearings fast” goal, with a full day that focuses on the places you’ll keep hearing about later. In practical terms, you save time by not figuring out routes, parking, and order of sights.
What you’re really buying is time and flow. You start from Auckland CBD, then the day moves like a scenic circuit: viewpoints, green space, waterfront breaks, and then a shift toward Devonport and North Head. That structure matters because Auckland’s best views tend to be spread out, and doing them all on your own can eat a whole day.
You can also read our reviews of more city tours in Auckland


The small-group ride: comfortable, but rules matter

This runs as a small tour, capped at a maximum of 5 people. The listing also states it’s limited to 6 participants, but either way the vibe is clearly meant to be intimate rather than crowded. That’s where the value often shows up: fewer people means you’re less likely to be rushed, and guides can tweak pacing.
The vehicle is described as comfortable and luxury-style, but there are also clear boundaries. Drinks in the vehicle aren’t allowed, and alcohol and drugs are not allowed (including no alcoholic drinks in the vehicle). It’s a minor thing, but it affects comfort if you’re someone who likes to sip on a bottle during transport.
If you’re the type who likes a running conversation, this is a good match. Reviews specifically mention guide skill, with Shin and Israel praised for making the day feel like more than just a checklist. If your priority is deep historical detail, still go for it, but be ready to ask follow-up questions at the stops.
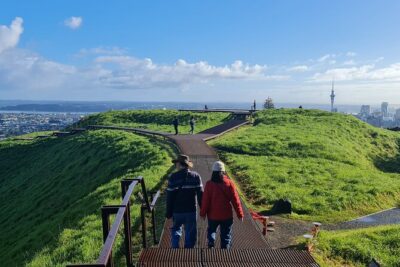
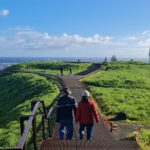
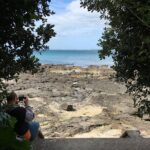
Mt Eden: the city-view opener that sets the tone
Your day kicks off with a stop at Mt Eden, including a photo stop, guided time, and about 30 minutes of your own time for sightseeing and walking. This is the kind of first stop that helps everything click later, because once you see Auckland from above, the rest of the day stops feeling random.
The benefit here is simple: you’re not guessing where you are when you later pass harbors and bridges. From a planning perspective, that first viewpoint is also a win for photos. You’ll have time to step away from the group, reposition, and take a few angles without feeling like you’re always late.
Practical tip: wear shoes that handle short walks. This is not described as a long hike, but you will be moving around during the stop, and you’ll enjoy it more if you can walk comfortably.
One Tree Hill and Auckland Domain: green-and-city contrast
After Mt Eden, the itinerary continues with One Tree Hill for about 30 minutes. Then you move to Auckland Domain, another 30-minute stop. Taken together, these two pauses do a job that a pure downtown walking tour can’t: they show you Auckland’s contrast between hills and parks right inside the city.
Why I like this pattern for visitors: it breaks up the day. Instead of spending hours on traffic and pavement, you get time where the air feels different and the views (and landmarks) are easier to understand. It also gives you a mental rest before the waterfront section.
The only catch is pace. These are shorter “see and absorb” stops, not long hangouts. If you’re hoping for a slow travel day, this tour is more like a well-guided highlight reel. Still, short stops can be the best way to avoid decision fatigue when you only have one day.
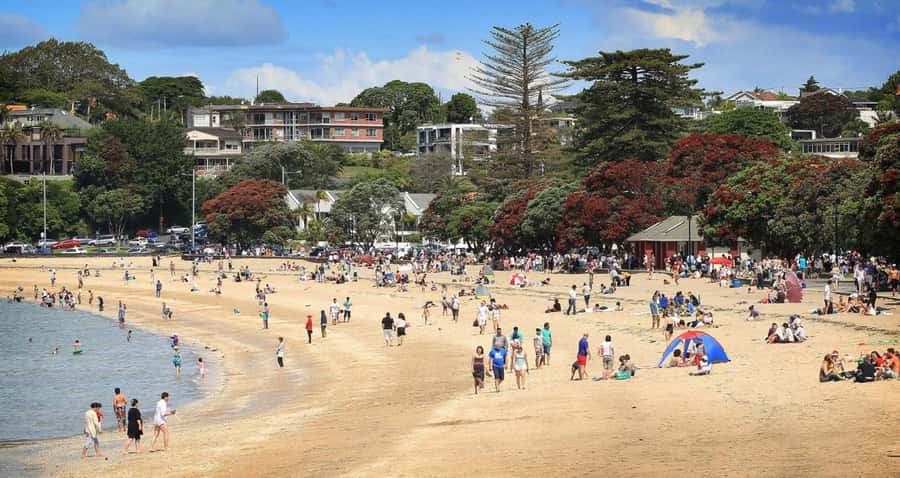
Mission Bay lunch break: where the day turns from sightseeing to breathing
Next up is Mission Bay, with about 1 hour total that includes break time, lunch, and free time for sightseeing. Since food and drinks aren’t included, you’ll pay for your own meal, but the value is that the tour builds in an actual breathing period rather than treating lunch like a rushed stop you grab on the way.
This is a great part of the day to think about what you want from the rest of the tour. If you’ve been busy taking photos at the viewpoints, Mission Bay gives you a chance to sit, reset, and decide how long you want to linger at later scenic spots.
A practical note: because drinks aren’t allowed in the vehicle, it’s smart to plan for hydration during breaks, not during transport. Use the time in Mission Bay to refill and recharge.
You can also read our reviews of more tours and experiences in Auckland

Viaduct Harbor and Harbour Bridge: quick recognition, good photo chances
Auckland’s waterfront areas can feel like movie locations, and this tour makes sure you get visual recognition of them. The day includes Viaduct Harbor as part of the highlights, and you also get a scenic drive / pass by the Harbour Bridge (around 10 minutes).
You don’t get a long, step-by-step walking plan here. It’s more of a “see it, register it, take the angles” moment. That’s actually efficient for first-time visitors. You’ll see the bridge in the context of the city you’ve already viewed from above, which makes the waterfront feel less like an abstract skyline.
If your goal is photography, keep an eye on timing. Short passes can produce great shots, but you’ll want to be ready to move when the van stops. The advantage of a small group is that you’re less likely to be squeezed between lots of people at a quick viewpoint.
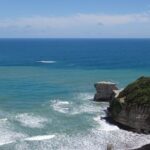
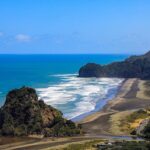
Devonport and North Head point: a different Auckland side
The afternoon shifts toward Devonport, including a photo stop, a guided component, and about 30 minutes on the ground. The tour description also specifically includes North Head point, which is often where you get that “bigger view” payoff for the effort of moving across the city.
What I love about this part of the day is the change in atmosphere. Devonport tends to feel distinct from central Auckland, and adding North Head point gives you a sense of the coastline and scale. It’s the section that helps the tour feel like more than just a set of hills and harbors—you get variety.
For many people, this is also the most memorable stretch because viewpoints and coastal energy tend to stick in your head longer than downtown streets. Even if you don’t plan to do a lot of walking, you’ll get time to look around and take photos.
One practical consideration: Devonport and North Head depend on the day’s route flow. Keep your camera and light layers handy, because coastal areas can feel cooler than the CBD.
Auckland Museum or Winter Garden: a history snapshot you can afford
The tour includes a stop at Auckland Museum or the Winter Garden. Here’s the important part for your budget: museum entrance isn’t included, and it’s listed as $28 NZD per person.
This is one of those choices where timing and motivation matter. If you’re the type who loves quick context—how the region’s story connects to what you’re seeing—this stop can genuinely improve your understanding of the day. If you’re more focused on outdoor views and photos, you might find the museum time less necessary, especially on a day with many other stops.
Either way, plan your cash for the entrance fee if you want that indoor component. It’s the only clearly stated entrance cost, so it’s easy to budget.
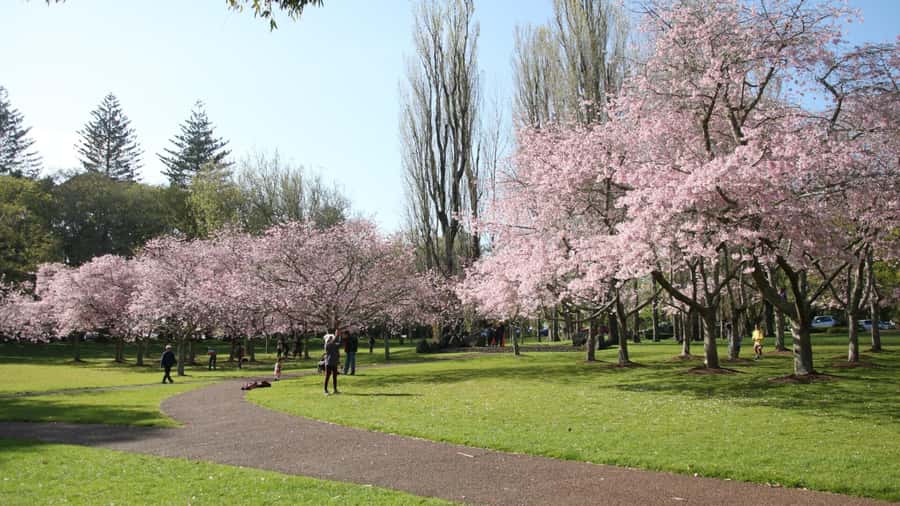
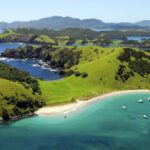
Cornwall Park and seasonal Parnell Garden: green time, route flexibility
The highlight list points to Cornwall Park, and you may also see Parnell Garden depending on the season. The Parnell Garden visit is explicitly described as season-dependent, which means you shouldn’t count on it as a guaranteed stop every time.
Still, the value of including green spaces like these is that they balance out Auckland’s viewpoints and waterfront sections. They offer scenic breaks that feel calmer, and they help the day stay varied without turning into a marathon.
If you’re traveling in a season when Parnell Garden is active, it can be a nice bonus. If not, you won’t feel like you lost something critical because the tour’s main pillars are still Mt Eden, Mission Bay, and the Devonport/North Head segment.
Who will love this tour most
This is a great match if you:
- are seeing Auckland for the first time and want a one-day highlights circuit
- like guides who connect locations with stories (the reviews call out guides such as Shin and Israel for strong storytelling)
- want a small-group experience where questions are easier and the pacing feels human
It’s also a good fit if you’re limited by time and don’t want to build your own route across hills and harbors. The tour handles the driving and sequencing, so you focus on the places.
If you’re the kind of traveler who wants long, slow visits at a single neighborhood, you might feel the day is structured tightly. The stops are mostly 30 minutes here and there, plus the Mission Bay and the ferry-side segment. It’s built for coverage, not lingering.
Price and value: $209 per person, plus what you should budget
At $209 per person for an 8-hour day, the price is fairly standard for a small-group guided tour with premium vehicle comfort. The biggest value drivers are:
- small group size (max 5)
- guided stops at key viewpoints
- pickup and drop-off from Auckland CBD
- a full route that includes multiple “you should see this” locations
But don’t ignore the extras. Food and drinks aren’t included, and you’ll likely pay for meals during the Mission Bay lunch break. Also, if you choose the museum option, budget $28 NZD per person for entrance.
So the real budgeting math looks like this: your base is $209, then add lunch and possibly museum entry. Once you do, it’s still a solid deal compared to piecing together private transport, parking headaches, and individual tickets for just one museum.
What the guide quality can change on your day
The reviews are a clear signal that the guide can make or break the experience. Shin is praised as very good, and Sung is singled out for adapting the route for a wheelchair guest. Israel gets credit for nice stories and a side stop while driving along the city.
On the flip side, one review described the day as mostly transport with limited history learning, and mentioned English that was hard to follow for the guide named Kevin. That doesn’t mean every day is the same, but it does mean you should treat the tour as partly about guidance style, not just destinations.
My advice: once the tour starts, ask one direct question early—about what you’re seeing at Mt Eden or what to focus on at Mission Bay. If your guide gives a confident answer and clearly explains the “why,” you’ll get more out of the rest of the day.
Should you book the Auckland City Tour with Stevong Travel?
I’d book it if you want a fast, guided overview of Auckland’s best-known places with a small-group feel and a comfortable vehicle. The tour is built for first-time orientation, and the mix of Mt Eden viewpoints, Mission Bay break time, and the Devonport/North Head segment is exactly the kind of spread that helps you understand the city quickly.
I would hesitate only if you strongly prefer long museum time or you know you need highly detailed historical explanation in English and want zero ambiguity. In that case, message ahead (if possible) and be ready to ask questions during the stops.
Overall, if your goal is to leave Auckland with photos you’re proud of and a clearer mental map of where everything sits, this tour is a practical choice.
FAQ
How long is the Auckland full-day city tour?
It runs for 8 hours.
Where is the pickup point?
Pickup is from Auckland CBD.
What does the tour include?
Pickup and drop-off are included. Food and drinks are not included, and museum entrance tickets are not included.
Is museum entry included?
No. The museum entrance is listed as $28 NZD per person (for the Auckland Museum stop option).
What places are on the itinerary?
You’ll visit Mount Eden, One Tree Hill, Auckland Domain, Mission Bay, Auckland Harbour Bridge (scenic pass), Devonport, and the North Head point area. The tour also includes Auckland Museum or the Winter Garden, plus Cornwall Park, and possibly Parnell Garden depending on season.
How big is the group?
This tour runs with a maximum of 5 people (it’s described as a small group limited to 6 participants).
Are food and drinks covered?
No. Lunch is part of the scheduled break time at Mission Bay, but food and drinks are not included. Drinks in the vehicle are also not allowed.