REVIEW · AUCKLAND
Auckland: Coromandel Day Tour including Hot Water Beach
Book on GetYourGuide →Operated by Auckland and Beyond Limited · Bookable on GetYourGuide
Hot springs, cliffs, and a spiraling train. This day tour mixes a Driving Creek Railway ride, thermal sand soaking at Hot Water Beach, and the walk to Cathedral Cove.
I especially love the variety: you get coast, countryside, and that rare chance to watch a train climb through native forest. The tour also feeds your day with planned stops and a guide who knows what you’re seeing.
Second, I really like the Eyefull Tower viewpoint—those wide Hauraki Gulf views make the drive feel like more than just getting there.
One drawback: it’s a long 12-hour day, and weather and tide timing can shape how the beach portion feels.
In This Review
- Key things you’ll notice on this Coromandel day trip
- Auckland to Coromandel: 12 hours that actually feel like a full day
- Riding the Scenic Train: Driving Creek Railway and the Eyefull Tower view
- Hot Water Beach: digging your own pool (and timing it with the tide)
- Cathedral Cove walk: the arched rock look and the 2-hour rhythm
- Lunch and breaks: how you manage food on a packed day
- Price and logistics: what $274 gets you (and where the value shows)
- Guide energy: why Simon, David, Nancy, and John matter to the experience
- When this tour is a great match (and when it isn’t)
- Weather and tide realities: how to avoid a bad-feeling day
- Should you book this Coromandel day tour from Auckland?
- FAQ
- How long is the Coromandel day tour?
- Where does pickup happen?
- What stops are included in the day?
- Is lunch included?
- What should I bring for Hot Water Beach?
- Is there a train ticket and Cathedral Cove access included?
- Is the tour wheelchair accessible?
Key things you’ll notice on this Coromandel day trip
- Driving Creek Railway combines native-forest scenery with tunnels, spirals, and viaducts in a 75-minute ride
- Eyefull Tower gives panoramic photo angles over the Hauraki Gulf and its islands
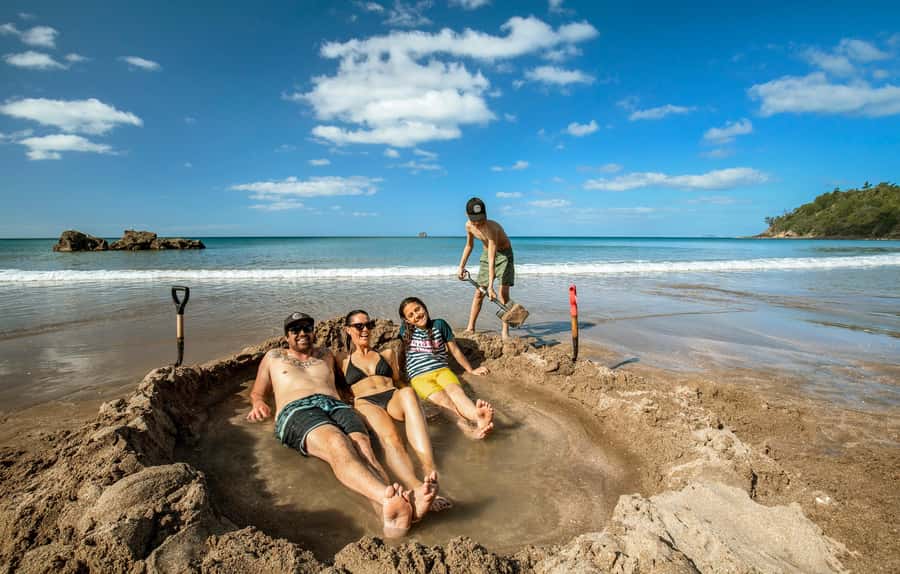
- Hot Water Beach low tide lets you dig your own hot pool in the sand (bring swim gear)
- Cathedral Cove Marine Reserve is a rewarding walk with iconic arched rock formations and turquoise water views
- Pickup from Auckland CBD plus a Mercedes van means less stress than driving yourself for a day this full
Auckland to Coromandel: 12 hours that actually feel like a full day
This tour works because it doesn’t try to squeeze in a single highlight. You build the day in layers: drive time that’s meant for scenery, a real transport “event” on the Driving Creek Railway, then two coastal stops that match the peninsula’s mood—thermal beach first, then dramatic rock coast.
From Auckland CBD pickup, you head through the Waikato Region and into the Bay of Plenty. There are planned photo stops and breaks along the way, which helps if you want the day to feel active without turning into a nonstop marathon.
Yes, it’s a 12-hour experience. That matters if you hate long days or you’re traveling with limited stamina. But if you like one-ride-a-day energy—train, beach, then a walk—this format clicks.
You can also read our reviews of more tours and experiences in Auckland.


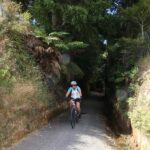
Riding the Scenic Train: Driving Creek Railway and the Eyefull Tower view

The tour’s standout transport moment is the Driving Creek Railway. You’re on board for about 75 minutes, winding through native forest with spirals, tunnels, and viaducts. Even if trains aren’t your thing, the route is built to give you moving viewpoints and constant visual change.
Then comes the payoff: the climb to Eyefull Tower. From up there, you get sweeping panoramic views over the Hauraki Gulf, with islands scattered across the water. It’s a simple add-on that makes a big difference—because it turns the day from “pretty coastal drive” into “I can see the whole coastline.” You’ll also have a great chance for photos before you head down to the beach.
This is also where a good guide can change the vibe. When I’m on tours like this, I love when someone connects the scenery to local details. Guides on this itinerary often point out plant life and share history to help you read the landscape as you go.
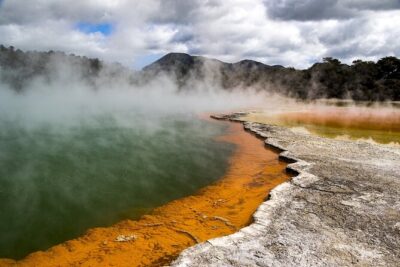
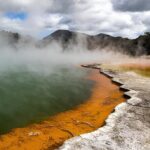
Hot Water Beach: digging your own pool (and timing it with the tide)
Hot Water Beach is where the tour stops being typical. The whole point is that you can dig your own hot pool in the sand. At low tide, you’re in the right zone to find the thermal waters and create a warm soak right on the beach.
Here’s the practical part you’ll want to plan for: bring swimming gear and a towel. You don’t want to show up thinking it’ll be a quick look from the shoreline. Even if you only soak for a short time, you’ll feel the difference between “cold beach” and “warm sand pocket” fast.
One key detail is that the starting time varies based on tide timings at Hot Water Beach. That’s not a small footnote. It means you’re not on a fixed clock for the beach. The payoff is that your day is shaped to fit the low tide conditions, which is exactly when the hot pool experience works best.
Weather can also play a role. If it’s cold or rainy, you may need a bit more comfort thinking ahead—warm layers, a plan to dry off, and an attitude that says, yes, thermal water is the perk, even when the day is grey.
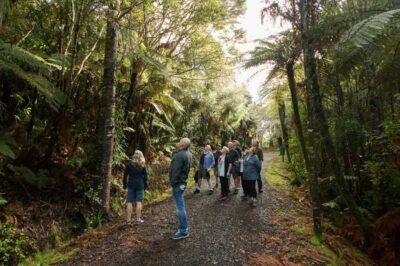
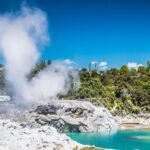
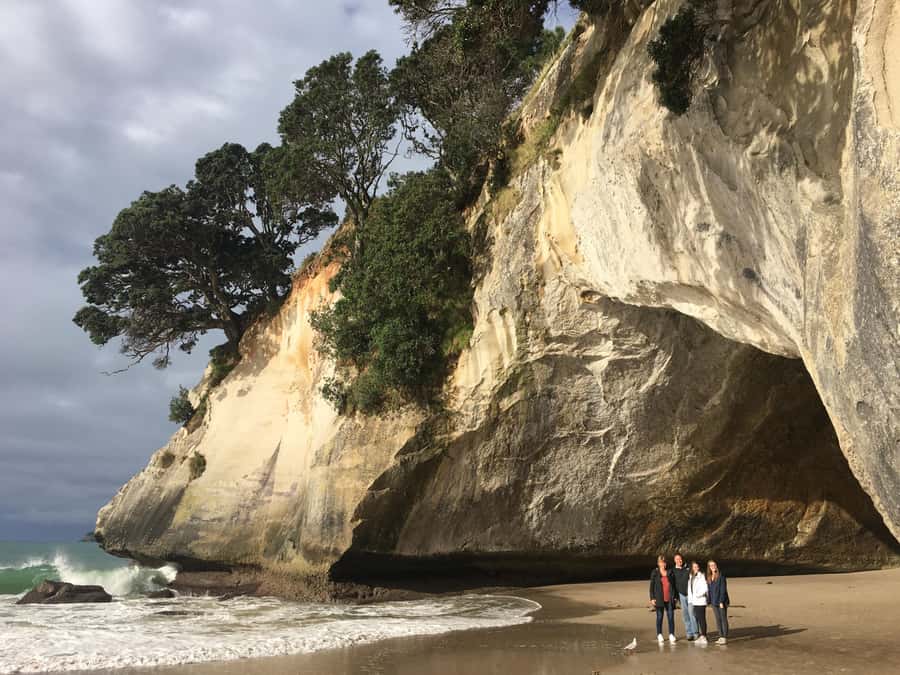
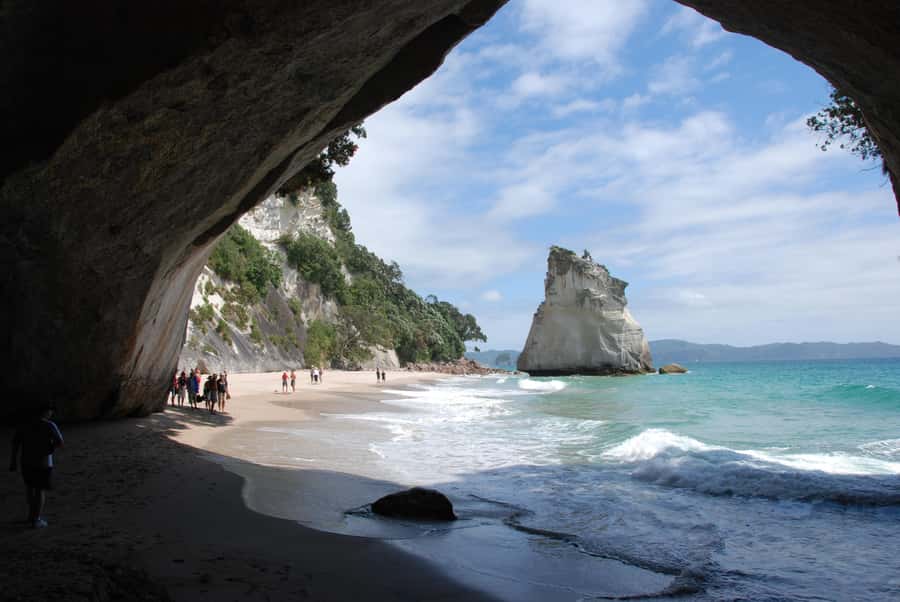
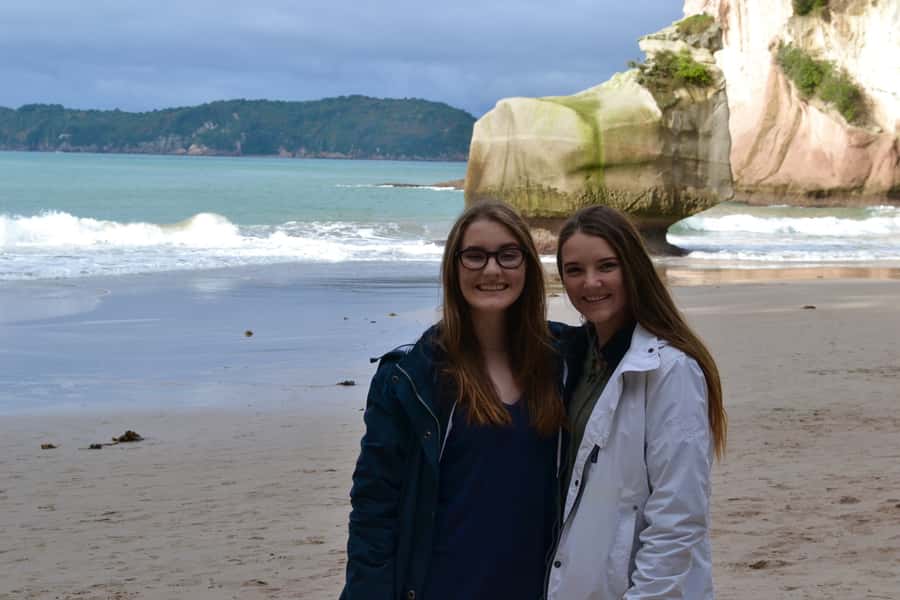
Cathedral Cove walk: the arched rock look and the 2-hour rhythm
After Hot Water Beach, the tour shifts from heat and soak to sea-and-stone drama at Cathedral Cove Marine Reserve. You access the area via a scenic walkway, and the walk itself is about 2 hours.
This walk is valuable even if you don’t consider yourself a “hiker.” The route is set up so you build toward the iconic scene rather than just trudging through scenery you’ve already seen. You get views that open up, rock formations that feel almost carved by the tide, and that famous cove look with turquoise water and golden sands framing the arched rock.
A guide can turn this into more than just photos. I like when someone stops along the way to point out local plants and explain what you’re looking at. On this itinerary, guides have been known to highlight things like silver ferns and mānuka during the walk, which helps you understand the ecology you’re walking through instead of treating it like a postcard backdrop.
A small reality check: the cove walk takes time and walking shoes matter. You’ll want comfortable shoes, because you’re doing both a beach portion and a coastal trail portion in one day.
Lunch and breaks: how you manage food on a packed day

Lunch is not included, but you can purchase it during stops along the way. This is pretty standard for a day trip like this, and it gives you freedom to choose what fits you best—though it does mean you’ll need to be flexible if timing runs tight.
If you’re the kind of person who plans meals early, you’ll still be okay. You just can’t treat lunch like a guaranteed sit-down. The schedule is built around fixed experiences—train duration, Hot Water Beach timing tied to tide, and the Cathedral Cove walk—so your best strategy is to eat when opportunities pop up rather than planning a single lunch moment.
Also: bottled water and light refreshments are included, which helps a lot. It’s the difference between “I’m fine” and “I’m suddenly grumpy at the 3rd hour.”


Price and logistics: what $274 gets you (and where the value shows)

At $274 per person for a 12-hour day, you’re paying for more than entry fees. You’re paying for the entire structure: transport from Auckland CBD, a Mercedes-Benz luxury van, a professional driver/guide, scenic stops, and included access to key experiences like the Driving Creek Railway entry and the Cathedral Cove walkway.
I think the best value part is the combination. Doing this route on your own means you’d need to juggle driving time, parking, and the tide-dependent Hot Water Beach timing. Here, the tour handles the “when” question by adjusting the day start to the tides at Hot Water Beach.
You also get practical touches: free Wi-Fi on board, bottled water and light refreshments, and “skip the ticket line” convenience for the ticketed part. Those small things matter more than you’d expect on a long day.
The main thing to weigh is whether you like guided pacing. If you hate schedules, this might feel like too much. If you like a clear plan and want someone else to handle the timing and logistics, it feels like a bargain.
Guide energy: why Simon, David, Nancy, and John matter to the experience
A day trip lives or dies by the guide. Here, the guide impact shows up in real ways: sharing local context, keeping the group moving smoothly, and making the time between big stops feel useful.
For example, guides like Simon have been praised for being flexible and upbeat even in cold, rainy conditions, plus for adding New Zealand history during the driving stretches. David has also been highlighted for a smooth, friendly approach with lots of new impressions. On the coastal walk, guides have pointed out specific plant life—like silver ferns and mānuka—so the Cathedral Cove trek becomes more than just looking at rocks.
Even the train portion can feel bigger with the right storyteller in the seat next to you. When you’re in the carriage with spirals, tunnels, and viaducts outside the window, a guide who can explain what you’re seeing turns the ride into something you remember, not just something you pass through.
When this tour is a great match (and when it isn’t)
This tour is best if you want a structured “greatest hits” Coromandel day without thinking about timing and logistics all day. You’ll like it if you enjoy rail scenery, thermal beach play, and walking to see iconic coastal rock formations.
It’s also a smart pick if you’re short on time in Auckland and don’t want to spend a night in the peninsula just to hit the highlights.
It may not be the best match if you:
- Need wheelchair access, because the tour isn’t suitable for wheelchair users
- Prefer to travel at your own pace instead of following a 12-hour plan
- Want a guaranteed long lunch stop, since lunch is available to purchase during stops rather than included as a sit-down meal
Weather and tide realities: how to avoid a bad-feeling day
You can’t control the sky. But you can plan so it doesn’t control your mood.
Hot Water Beach depends on low tide, which is why the tour’s start time shifts with tide conditions. That means the “best moment” is prioritized, even if your day feels slightly different from what you expected. You’re there for the experience, not just the location name.
For weather, bring a realistic outfit mindset. If it’s cold or rainy, the thermal soak is still the feature, but you’ll feel it more if you dress for comfort. Wear weather-appropriate clothing, and bring layers you can manage after getting wet.
And for both the beach and the walk: wear footwear you trust. You’re doing sand soaking and then walking the Cathedral Cove walkway. Comfort here prevents the day from turning into sore-feet regret.
Should you book this Coromandel day tour from Auckland?
If you want the Coromandel in one day—Driving Creek Railway, Hot Water Beach, and Cathedral Cove—this tour is a strong choice. The value isn’t just the sights. It’s the way the day is assembled: tide timing handled for you, included entrances, and a guide who adds meaning during the drive and the walks.
I’d book it if you’re excited by hands-on Hot Water Beach soaking and you like the idea of a rail ride that’s more than a transfer. I’d think twice if you’re sensitive to long days or you need wheelchair-friendly access.
If you fall in the middle—curious, flexible, and ready for a full day of mixed scenery—this is the kind of Auckland-based tour that can make you feel like you did something special without needing extra nights on the road.
FAQ
How long is the Coromandel day tour?
The tour lasts about 12 hours.
Where does pickup happen?
Pickup is included from Auckland CBD, including complimentary pickup and drop-offs from most Auckland Central hotels.
What stops are included in the day?
You’ll visit Driving Creek Railway, Hot Water Beach, and walk to Cathedral Cove in the Cathedral Cove Marine Reserve area.
Is lunch included?
Lunch is not included, but you can purchase it during stops.
What should I bring for Hot Water Beach?
Bring comfortable shoes, plus swimming gear and a towel if you plan to soak in the hot water.
Is there a train ticket and Cathedral Cove access included?
Yes. Entry and the train ride at Driving Creek Railway are included, and you get access to the Cathedral Cove walkway.
Is the tour wheelchair accessible?
No, it’s not suitable for wheelchair users.